
An independent guide to visiting Bangkok, including when to go, how to get around, where to stay, what to see and the best photography locations.
Words & photography by Pete Rudd
Reading time 7 minutes
After many visits to Bangkok, I thought it was time to put together my Ultimate Bangkok Travel Guide and share some of the places, experiences and practical information I’ve picked up along the way.
Bangkok has been one of my favourite cities in the world for years. I first visited around ten years ago and, if I’m honest, my first impressions weren’t particularly positive. Growing up in a small village in the south east of England, I wasn’t used to the fast-paced city life that Bangkok throws at you.
Over the years, though, that completely changed. This was around my sixth visit when I originally wrote this guide, and Bangkok had become one of my favourite places to simply get lost in.
The city has an incredible mix of temples, markets, street food, modern architecture, rooftop bars and chaotic back streets, and there always seems to be another part of it to discover.
No matter how long you stay, there never seems to be enough time to see everything on the list. I always find myself saying, “I’ll do that next time.”
So perhaps the biggest lesson I’ve learnt from visiting Bangkok is simple: don’t judge a book by its cover.
Bangkok At A Glance
| Country | Thailand |
| Capital | Bangkok |
| Currency | Thai Baht (THB) |
| Language | Thai |
| Time Zone | UTC+7 |
| International Airports | Suvarnabhumi (BKK) & Don Mueang (DMK) |
| Getting Around | BTS, MRT, boats, taxis, Grab & tuk-tuks |
| Recommended Stay | 3–5 days |
| Best For | Food, culture, photography, nightlife & city exploring |
| Photography | Excellent throughout the city |
Travel information and prices can change, so always check current details before travelling.
When Is The Best Time To Visit Bangkok?
Bangkok is a city that stays busy throughout the year, but the weather can make a big difference to how comfortable you are exploring it.
I’ve visited mainly between December and February, as well as during July and August, and there is nothing that quite prepares you for the humidity in Bangkok — particularly if you’re arriving from somewhere cooler like the UK.
November – February
Generally considered one of the more comfortable periods for exploring Bangkok, with lower humidity and less rainfall than the wetter months.
March – May
Temperatures can become extremely hot, making the middle of the day challenging if you’re planning to spend lots of time outside.
June – October
The wetter part of the year, although rain doesn’t necessarily mean it will be wet all day. Heavy showers can come and go quickly, and the city can look spectacular afterwards.
My Advice
Thailand is a huge country and the weather can vary considerably depending on where you’re travelling.
If Bangkok is only one stop on a larger Thailand trip, check the weather for each destination rather than assuming the whole country will have the same conditions.
Pete’s Tip: If you’re planning to photograph Bangkok, early mornings and late afternoons are much easier on both you and your camera than spending hours outside in the middle of the day.
How To Get Around Bangkok
One of the things I love about Bangkok is how many different ways there are to get around.
Whether you want the local experience of a tuk-tuk, the convenience of Grab or the simplicity of the BTS and MRT, getting around the city is generally straightforward and affordable.
BTS Skytrain
The BTS is one of the easiest ways to move around central Bangkok, particularly when traffic is heavy.
Best for: Avoiding road traffic and travelling between central areas.
MRT
The underground MRT connects several important parts of Bangkok and is particularly useful for reaching areas such as Chinatown.
Best for: Chinatown and connecting with other parts of the city.
Grab
Grab is an easy option when you don’t want to negotiate with drivers or work out public transport.
Best for: Door-to-door journeys and longer trips.
Taxis
Metered taxis can be extremely affordable, although traffic can make journeys much slower than they appear on a map.
Tuk-Tuks
My personal favourite.
They’re not always the most practical way to get around, but taking a tuk-tuk through Bangkok is part of the experience.
River Boats & Water Taxis
When the roads are completely jammed, the river can be a much more peaceful alternative.
I’ve used the boats to avoid rush-hour traffic, and travelling along the river gives you a completely different perspective of Bangkok.
Pete’s Tip: Don’t judge journey times by distance alone. Bangkok traffic can be brutal, particularly around busy periods, so always allow extra time.
Mobile Data & Staying Connected
Until relatively recently, I never bothered buying a local SIM card when travelling and would simply rely on Wi-Fi.
I’ve since realised how limiting that can be.
Having mobile data means you can use Google Maps while you’re out exploring, check transport routes, book a Grab, find a restaurant or work out your next destination without constantly having to stop at a café or hotel.
For Bangkok, I’d recommend travelling with a smartphone that has access to 4G or 5G data.
Why Mobile Data Is Useful
- Google Maps and navigation
- Booking Grab
- Checking train times
- Translating Thai
- Finding restaurants
- Checking opening times
- Booking tickets
- Staying in contact while exploring
Pete’s Tip: Having mobile data is particularly useful when you’re visiting some of the more remote photography locations outside central Bangkok.
The Best Photography Locations In Bangkok
Bangkok is one of those cities where you don’t have to look very hard to find something worth photographing.
From the maze of Chinatown’s streets to temples, railway lines, huge Buddha statues and constantly changing city views, there are opportunities almost everywhere.
These are seven of my favourite photography locations from my visits to Bangkok.
I’ve included practical information for each one, including how to get there, when I would visit and a few photography tips from my own experience.
01. Chinatown
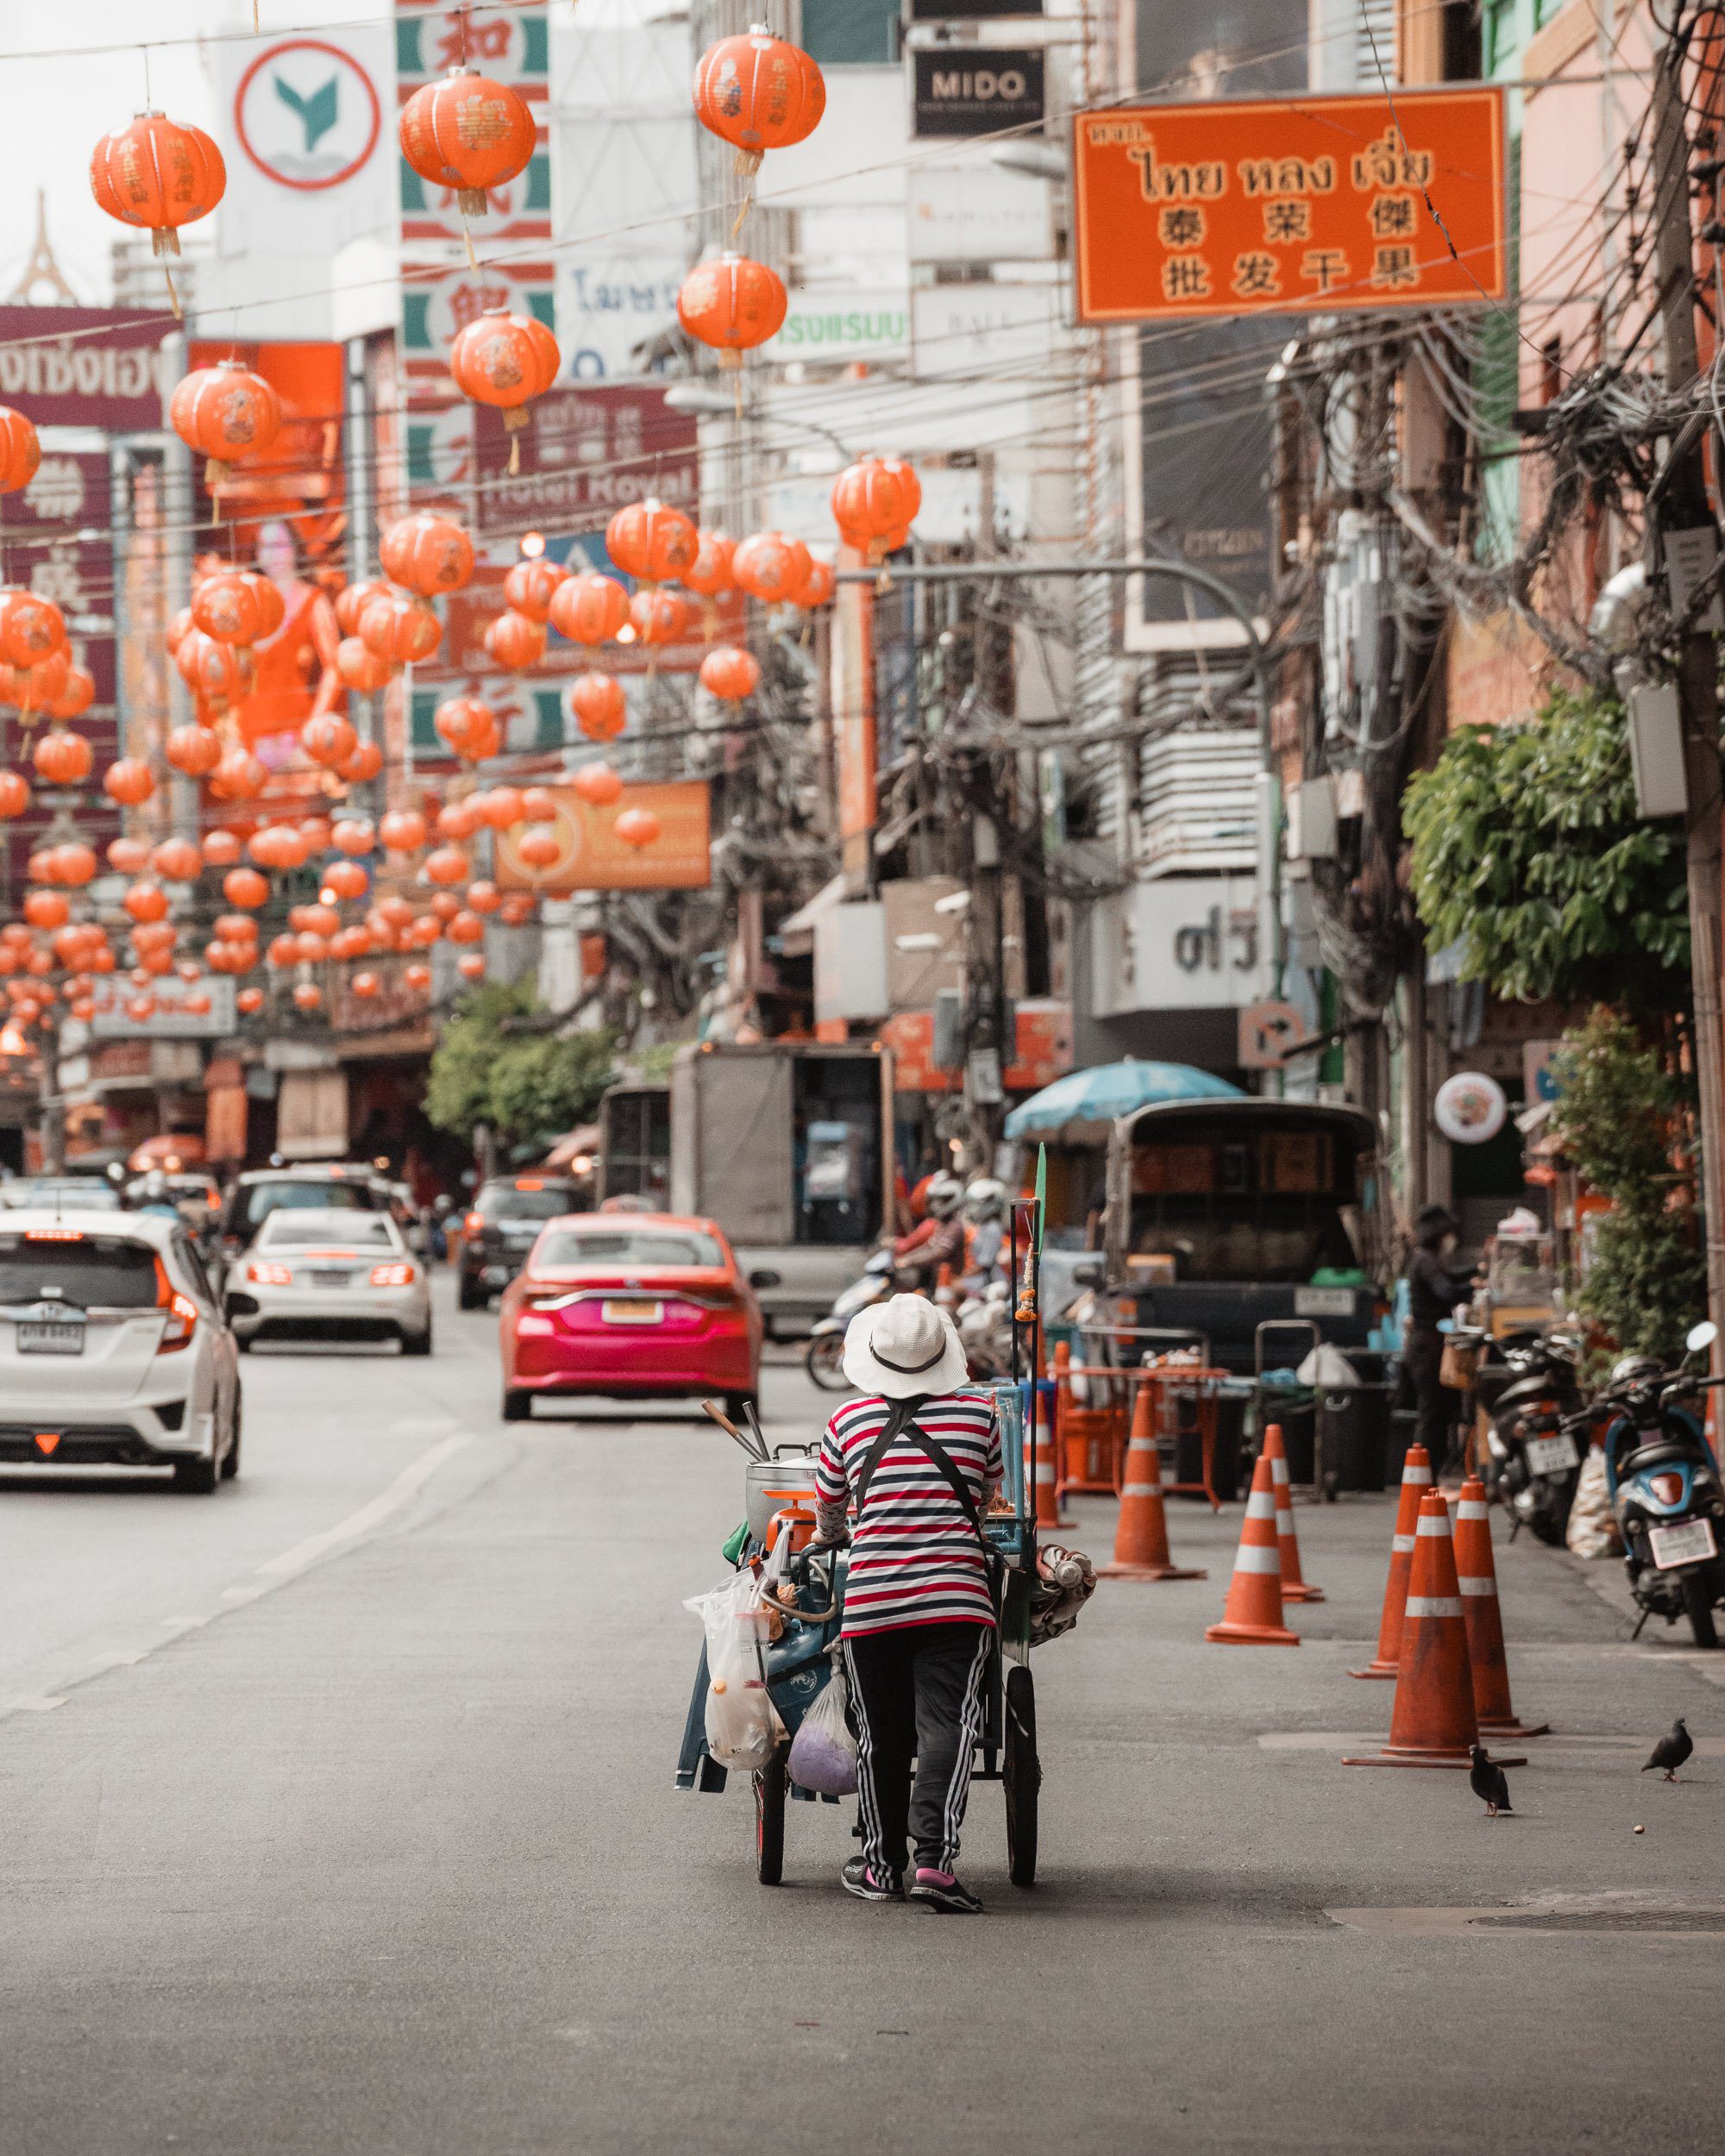
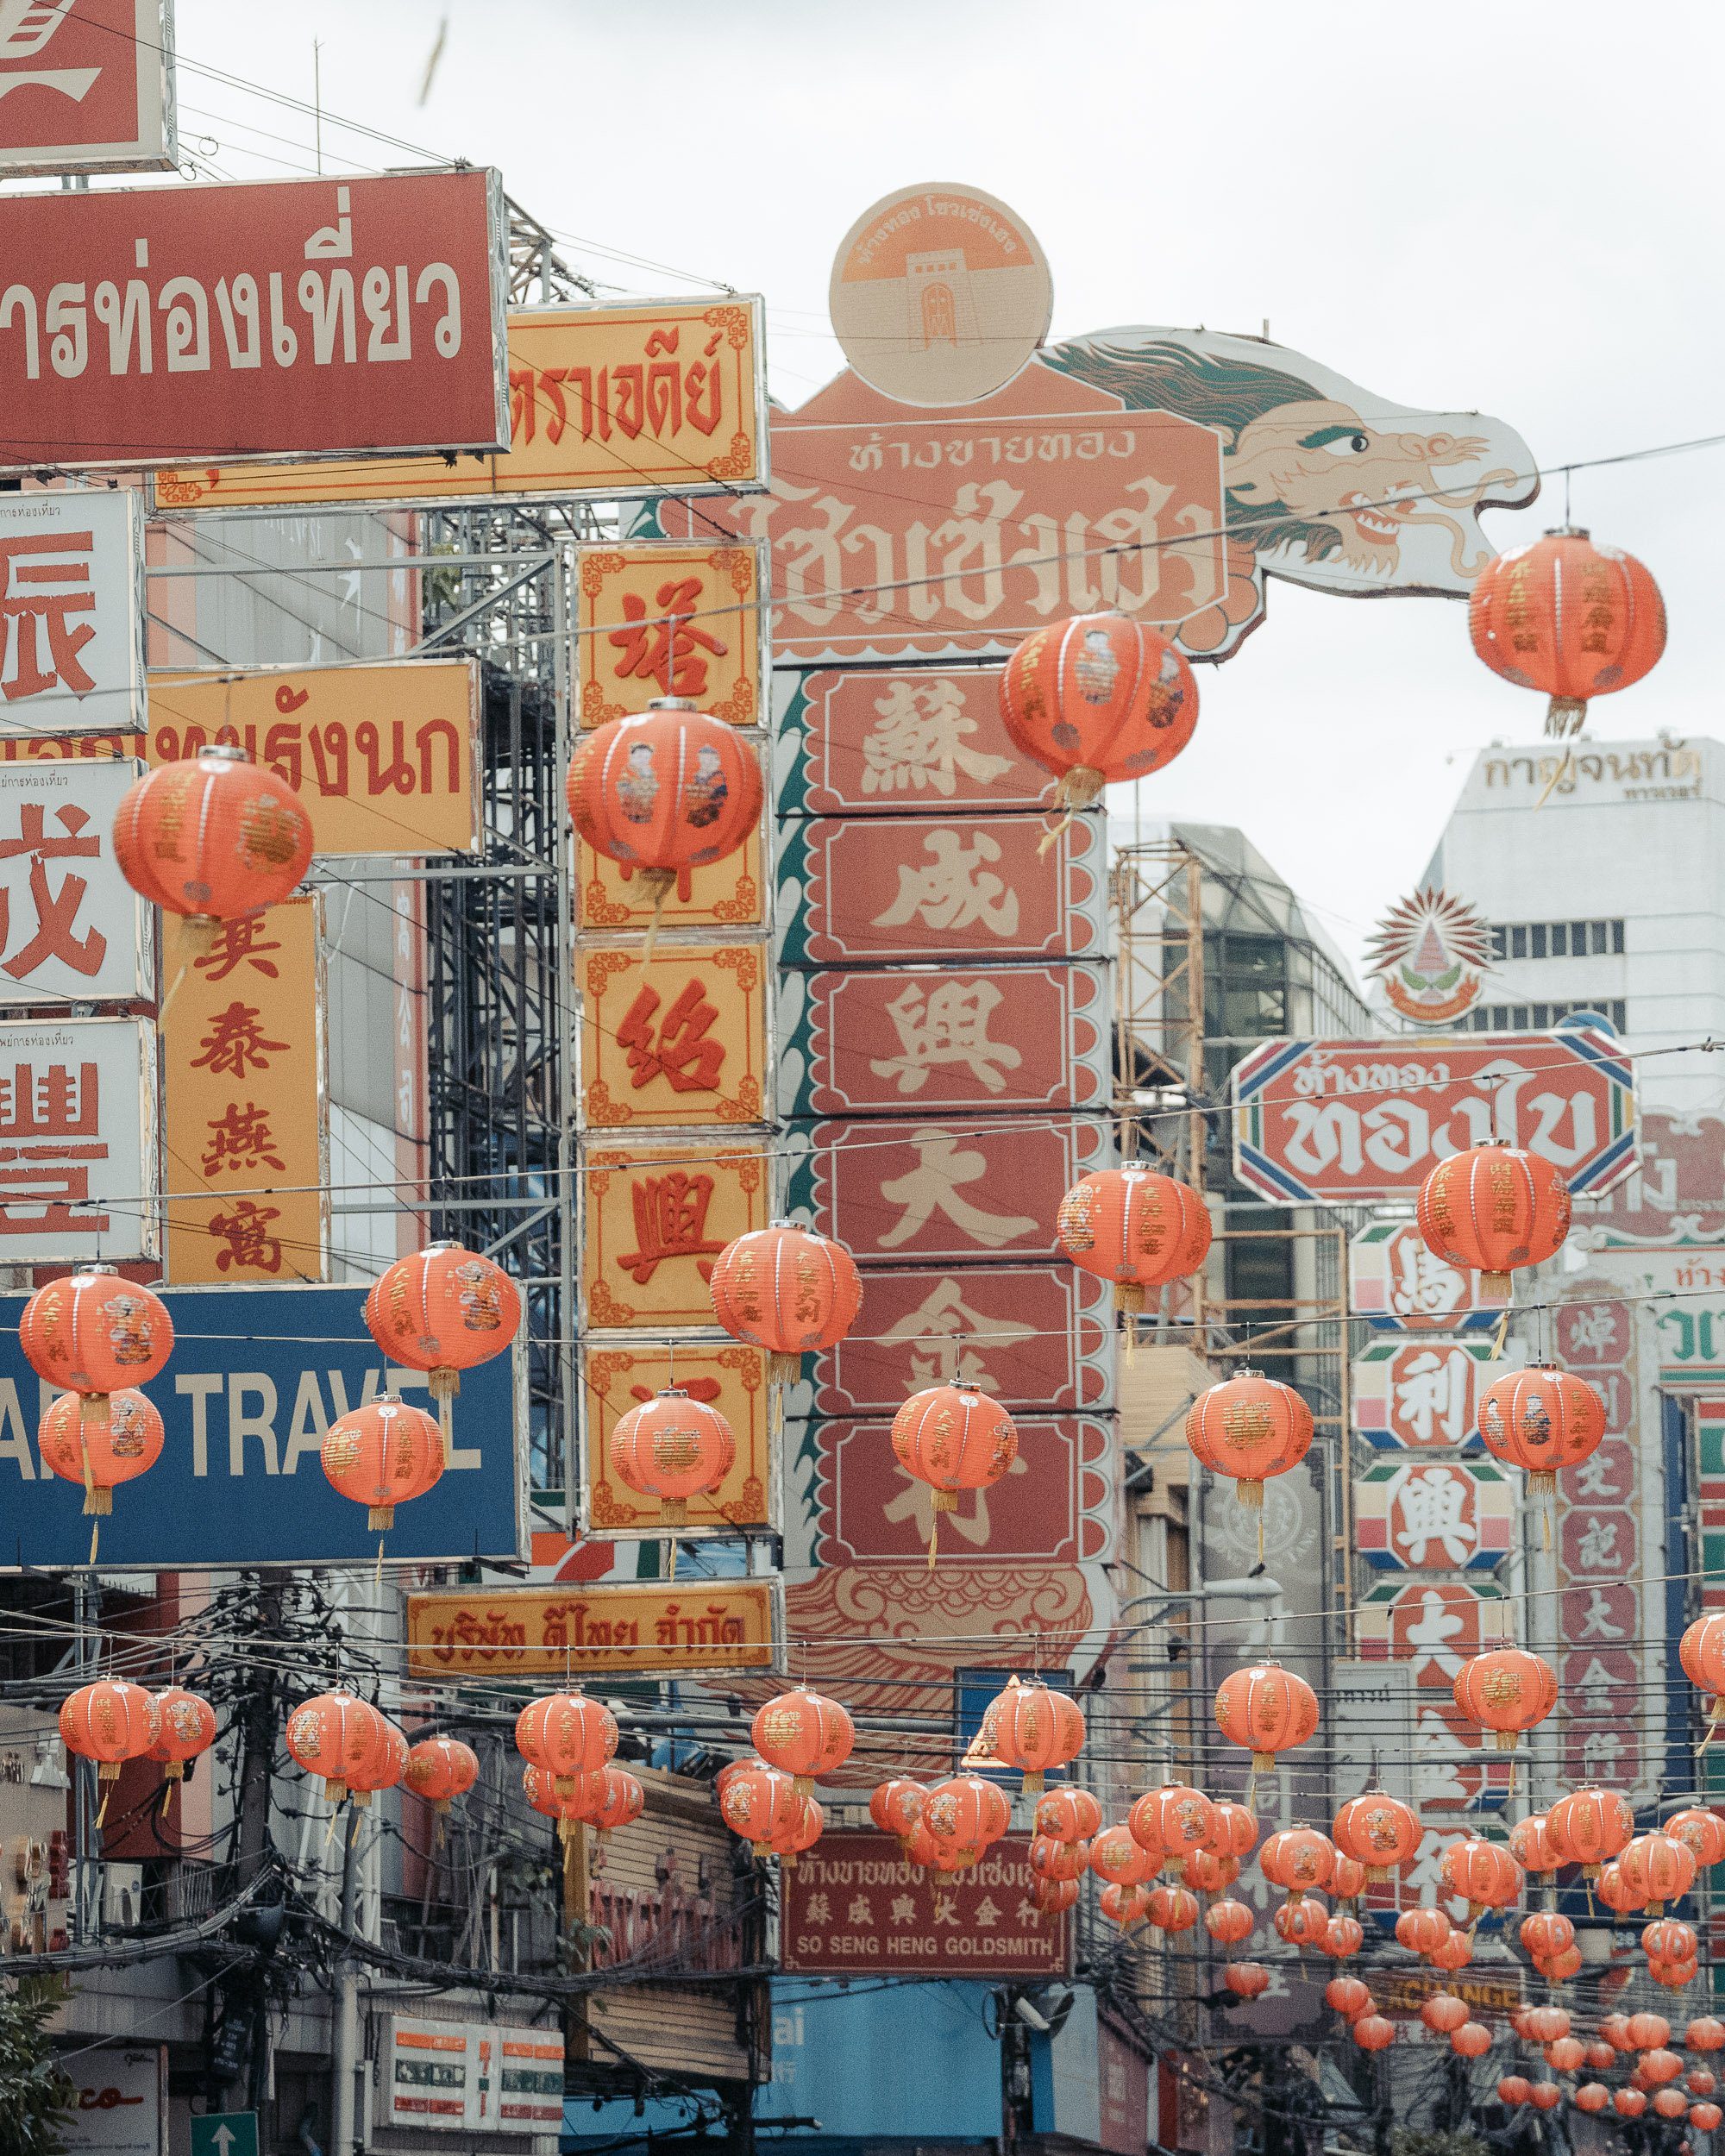
Bangkok’s Chinatown is one of my favourite areas to explore and is a great place to spend an afternoon with a camera.
The maze of small streets and alleyways creates endless opportunities for street photography, while the markets, food stalls, shopfronts and neon signs give you plenty to work with.
How To Get There
There isn’t a BTS station directly in Chinatown, but the MRT at Wat Mangkon makes getting there easy.
You can also use Grab or a taxi.
Best Time To Visit
Late afternoon into the evening.
The area becomes much more atmospheric as the lights come on and the streets become busier.
Cost
Free
Photography Tip
For me, evening is the best time to photograph Chinatown. The combination of neon lights, street food, people and busy alleyways creates far more opportunities for street photography.
Don’t just stick to the main road. Get lost in the smaller streets and see what you find.
02. The Trains Of Bangkok
Photographing the trains around Bangkok has become increasingly popular, with photographers such as Jord Hammond showcasing some really interesting perspectives that were relatively unseen on social media when I first started exploring the area.
The key here is not to concentrate solely on photographing the train.
There is always something happening around the railway lines, and some of my favourite images have come from photographing the environment around the trains rather than simply waiting for the next one to arrive.
How To Get There
We used a Grab from Chinatown, which made the most sense for us.
Ask the driver to drop you near one of the alleys beside Wat Sai station and have your camera ready.
From there, we walked towards Chom Thong Station, photographing everything we found along the way.
Best Time To Visit
I’d recommend going earlier in the day if possible.
We arrived late, and the sun was already extremely hot.
Cost
Free
Photography Tip
If you have mobile data, use Google Maps to check the station and get an idea of when trains are due.
We found that the trains were only a few minutes apart.
Just make sure you work out which direction the train is coming from and, most importantly, stay well clear of the tracks.
Do not put yourself or anyone else at risk for a photograph.
03. Hua Lamphong Railway Station
Hua Lamphong Railway Station is one of Bangkok’s most recognisable railway landmarks.
When I visited in February, I learnt that the station was due to close, so I made an early morning walk from our hotel in Chinatown to see it for myself.
Luckily, although services were limited, there were still trains operating.
How To Get There
If you’re staying around Chinatown, Hua Lamphong is within walking distance.
The station is also connected to Bangkok’s MRT network, making it relatively easy to reach from other parts of the city.
If you’re travelling by road, be prepared for congestion around the area.
Best Time To Visit
Early morning.
The large windows allow beautiful morning light into the station, making it a particularly atmospheric time to photograph.
Cost
No entrance fee
Photography Tip
Bring a selection of lenses.
I’d recommend something around 24mm or 35mm, a 50mm, and potentially a longer zoom for compressed perspectives.
I took my 70–200mm with me and found it useful for picking out details.
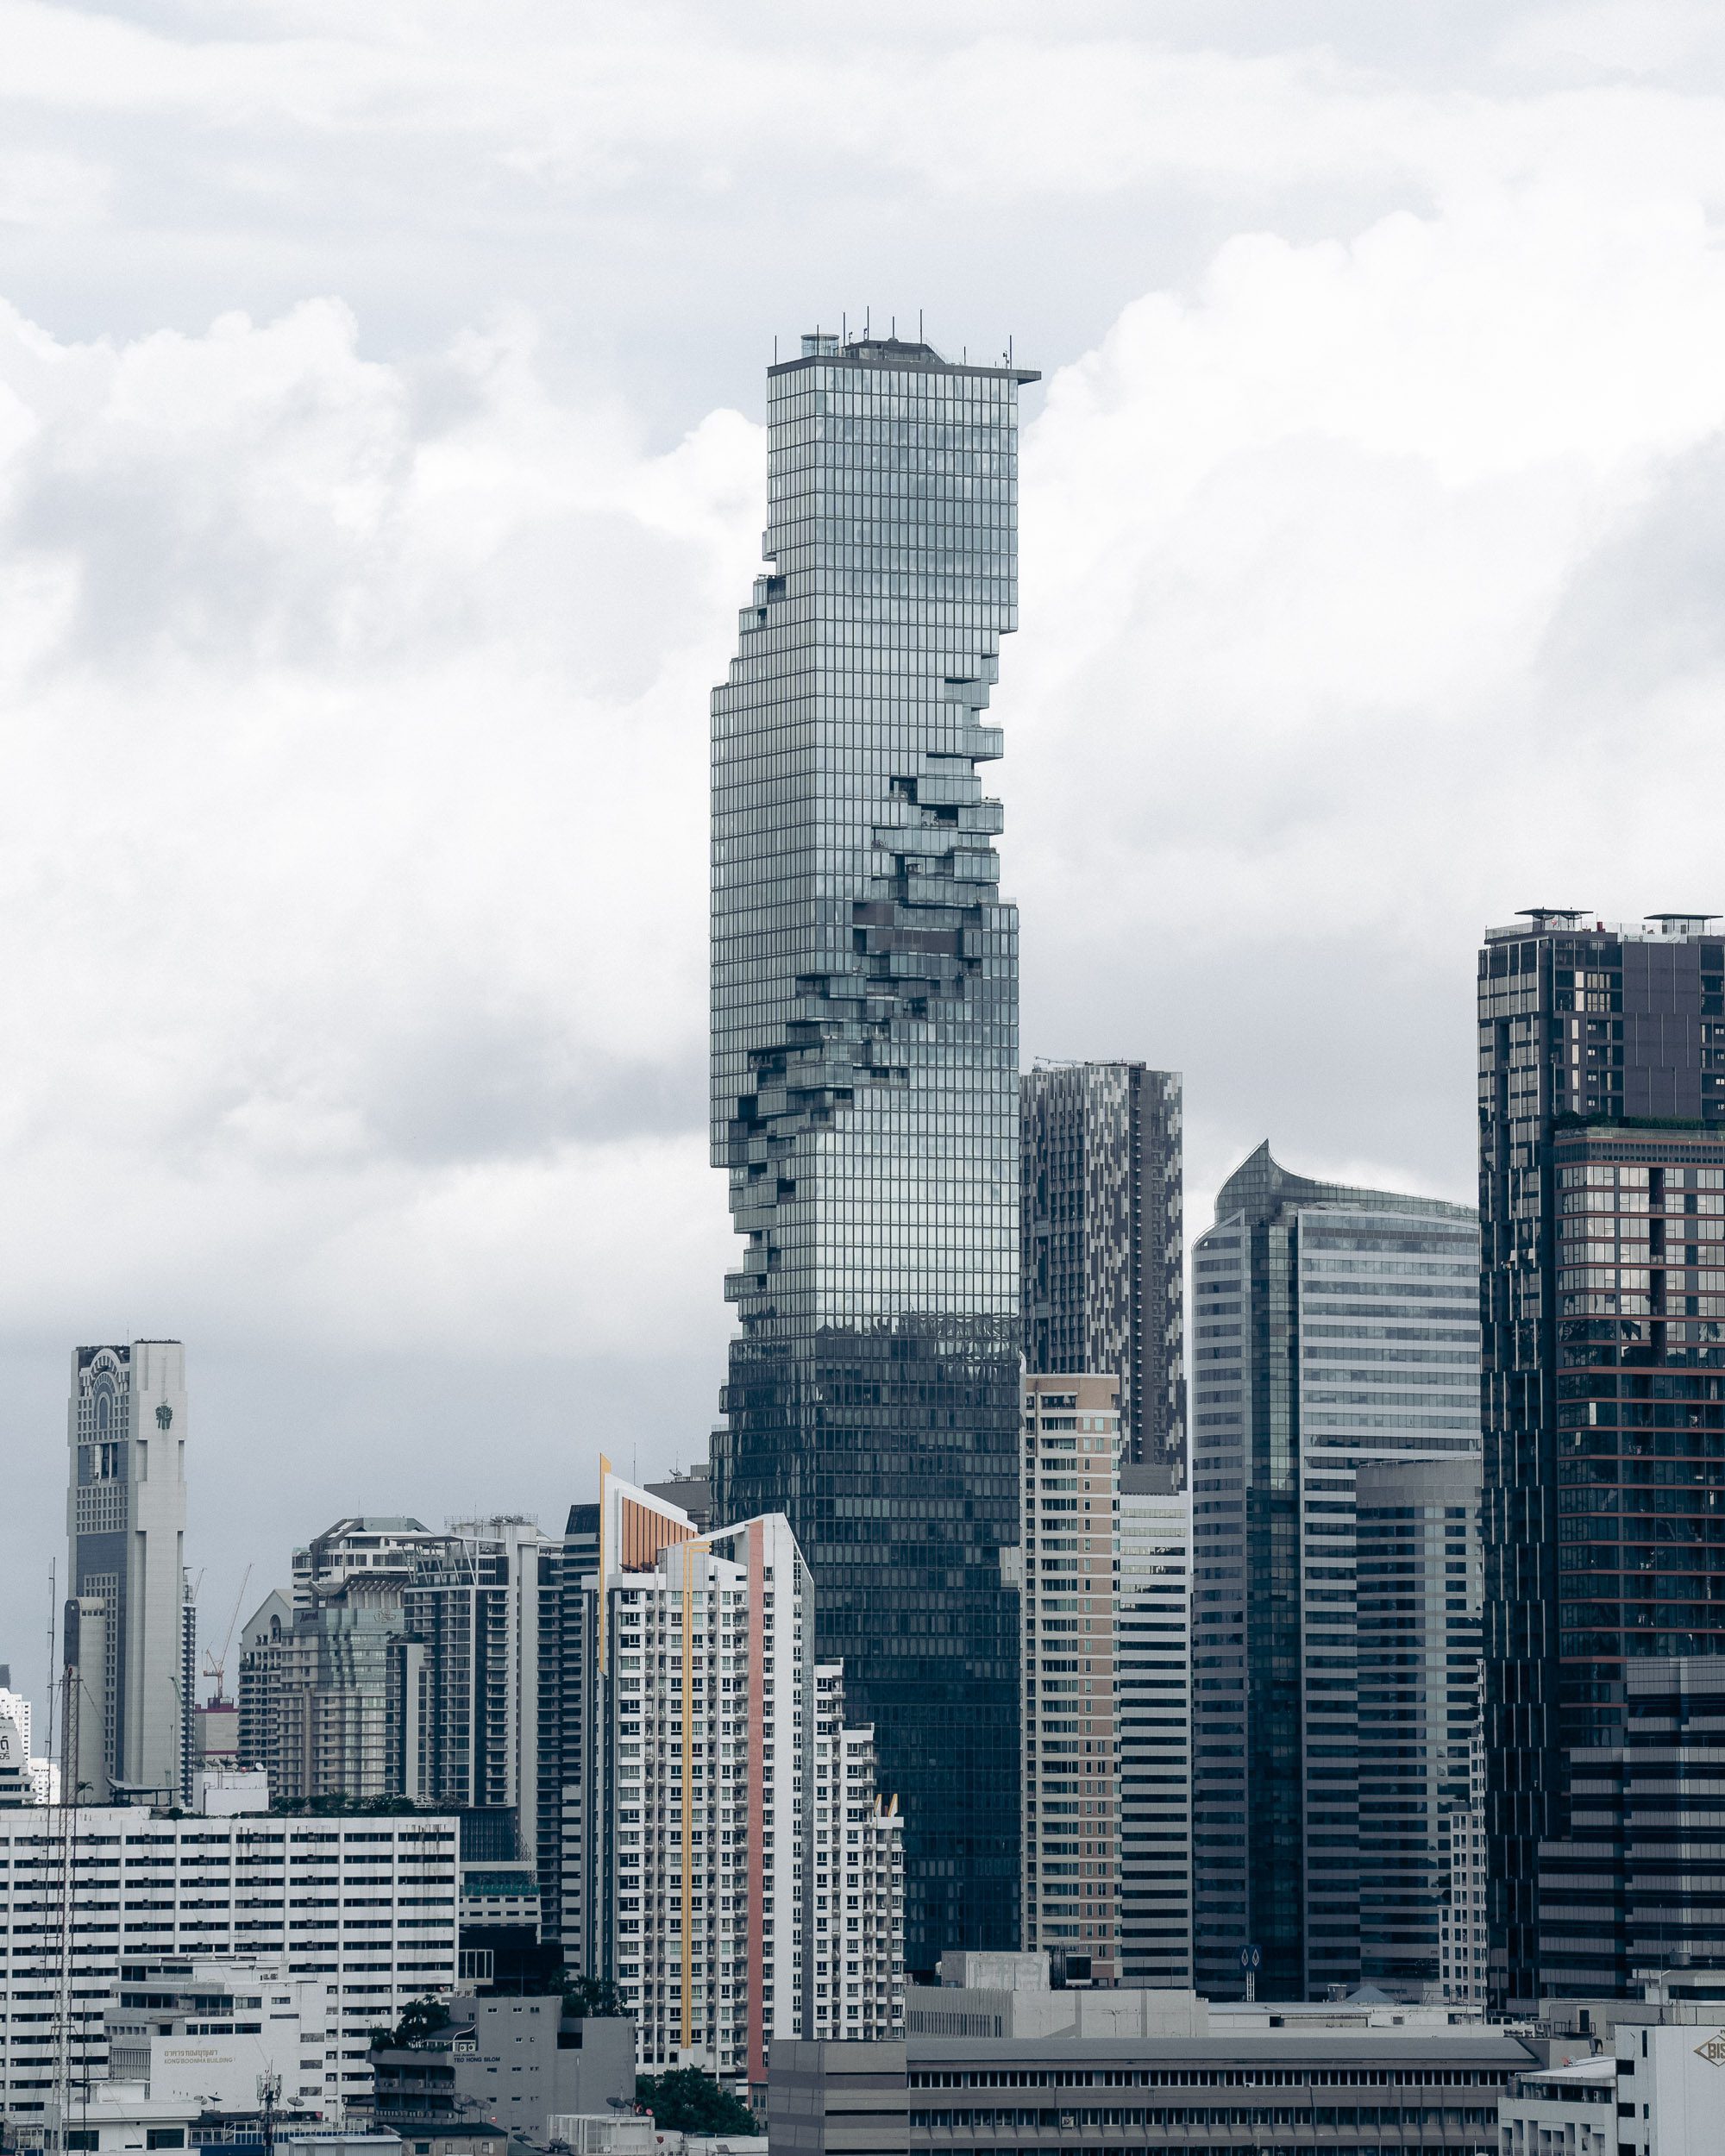
04. Lebua State Tower & King Power
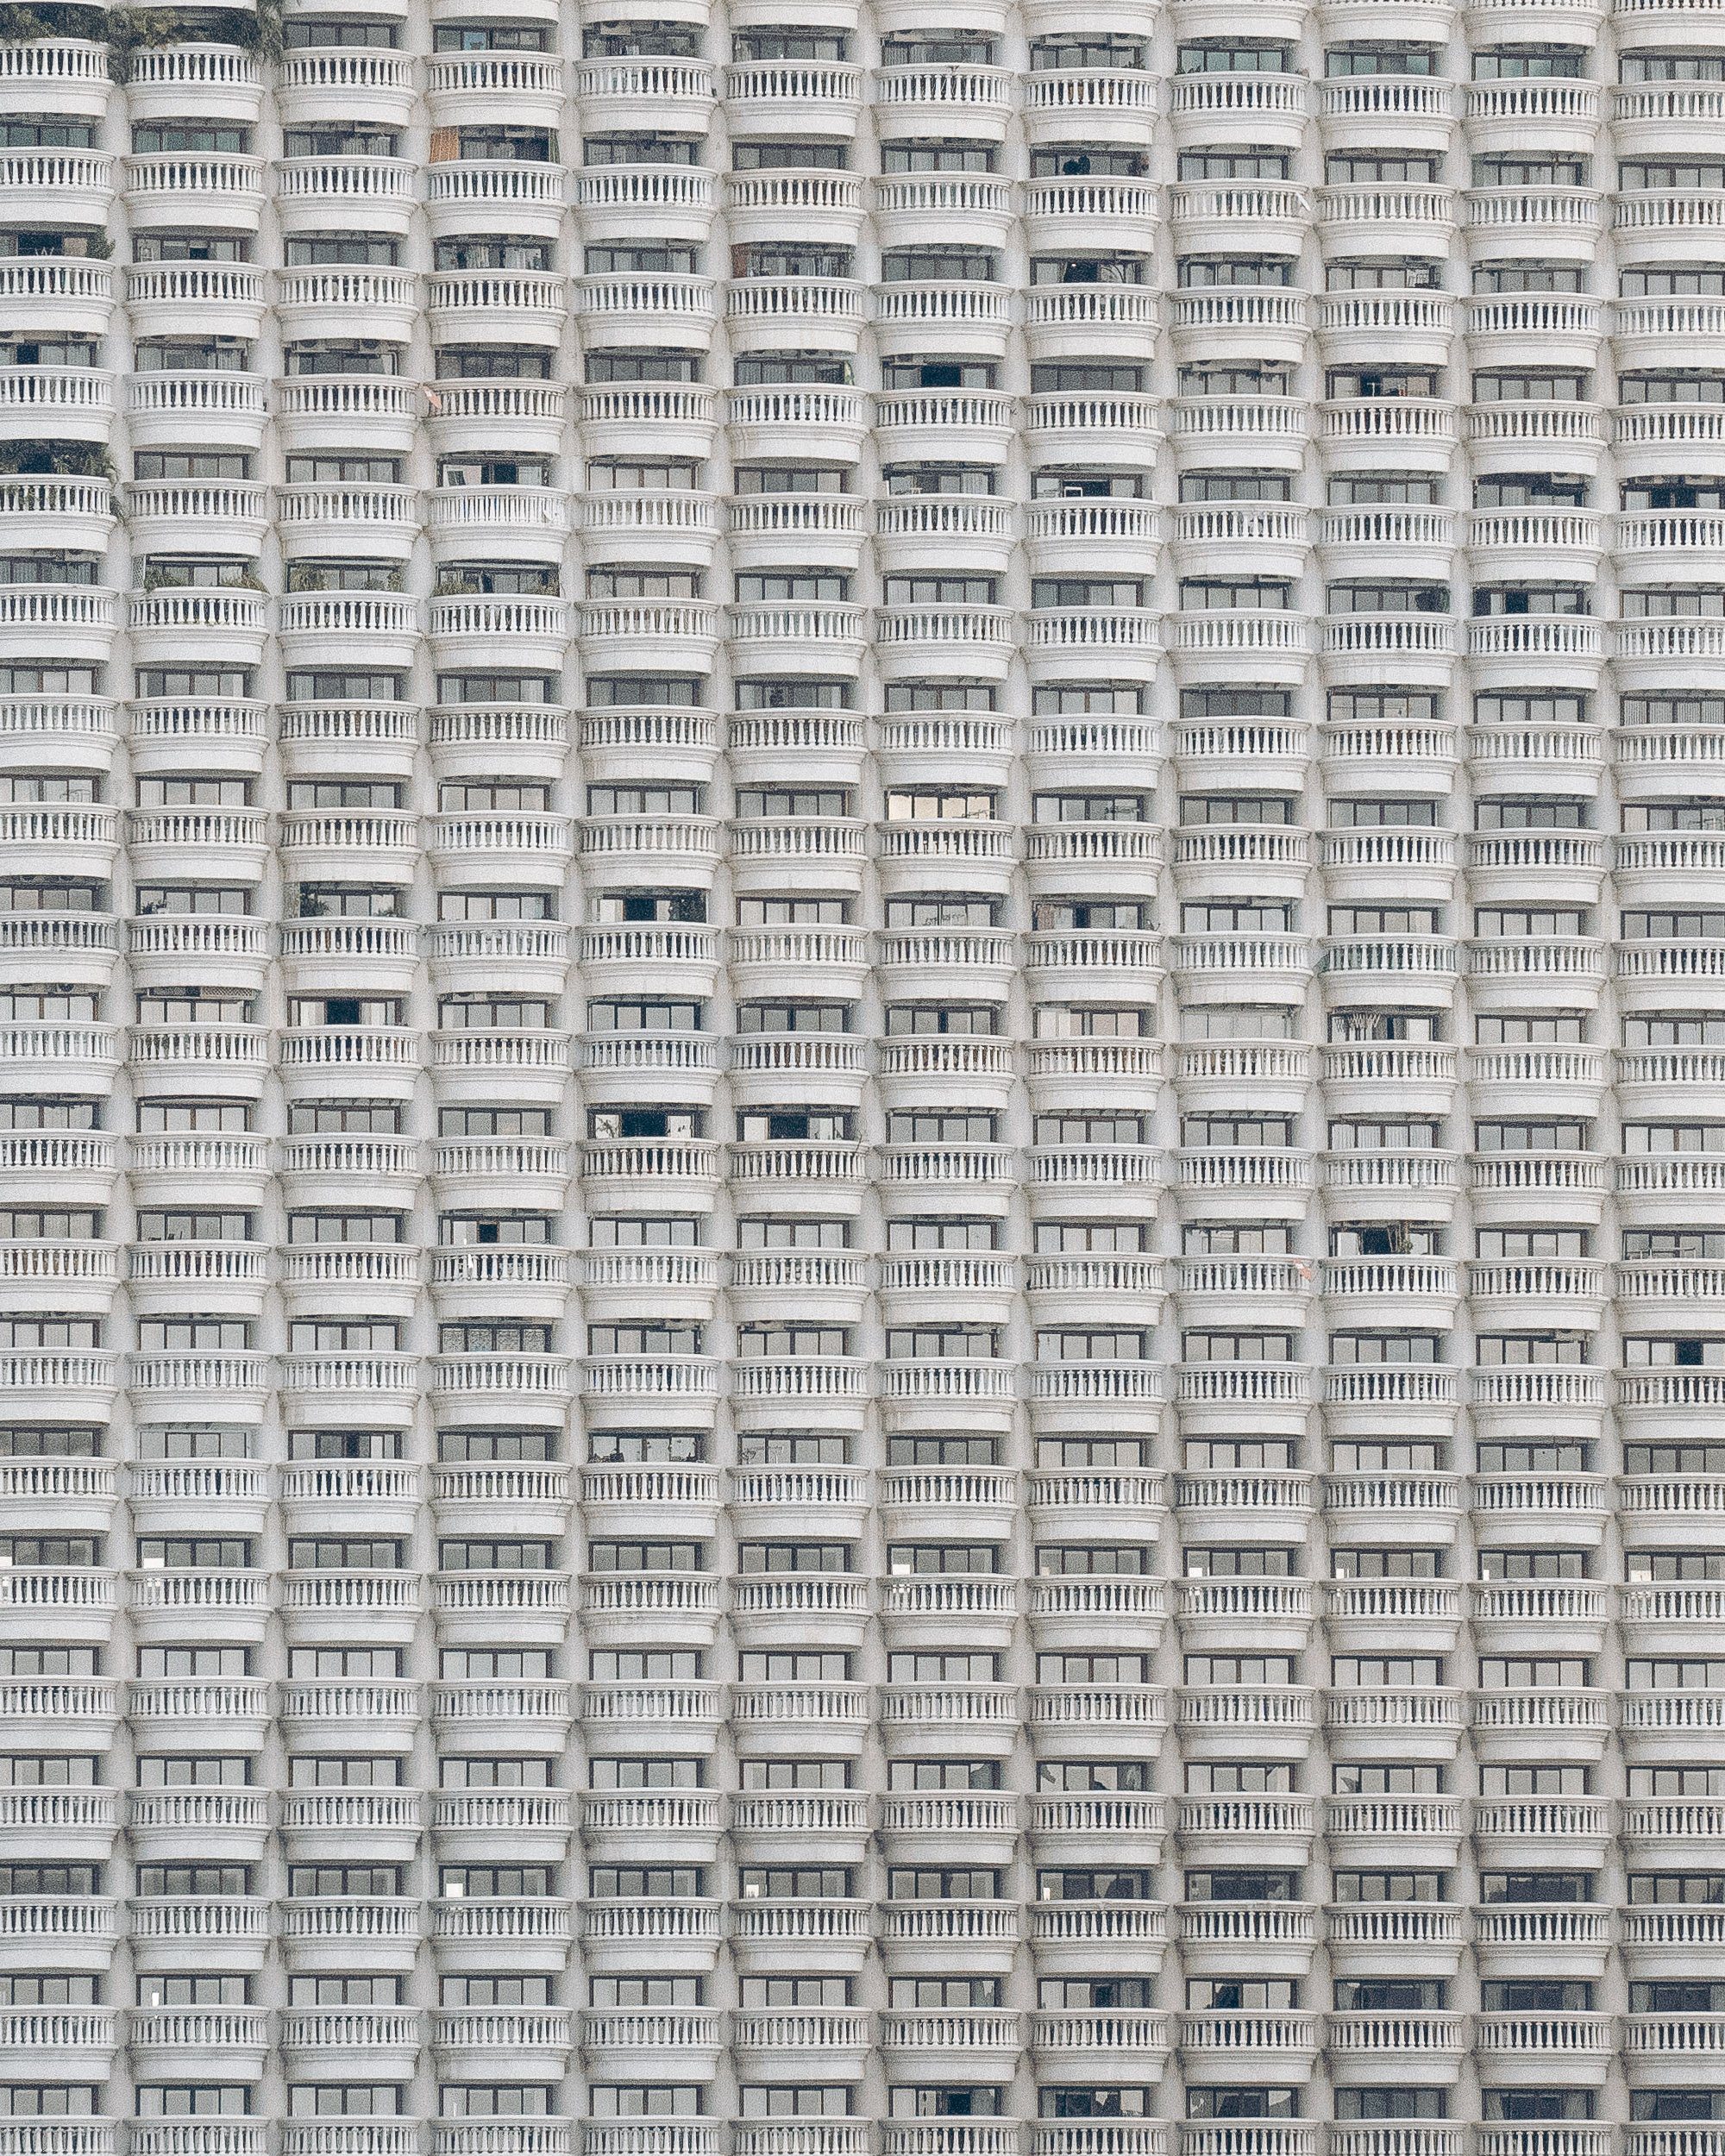
Made famous as a filming location for The Hangover Part II, Lebua State Tower is one of Bangkok’s most recognisable buildings.
I’ve visited the rooftop on previous trips for a cocktail or two, although remember that you’ll need to dress appropriately if you’re planning to visit the bars.
For photography, however, one of my favourite perspectives is actually from across the river.
We headed over to Iconsiam and found a great viewpoint of the skyline, including Lebua State Tower and King Power.
We caught the river boat from Sathon Pier, which gave us a much more relaxed journey than battling Bangkok’s roads.
How To Get There
Take the river boat from Sathon Pier towards the riverside.
Alternatively, you can travel by road depending on where you’re staying.
Best Time To Visit
Late afternoon into sunset.
If you’re photographing the skyline from across the river, the changing light can give you several different looks within a short period.
If you’re heading up the tower itself, sunset is a popular time to experience the views.
Photography Tip
Bring the longest lens you own — or borrow one.
A longer focal length will allow you to compress the skyline and isolate the tower from the surrounding buildings.
Pete’s Tip: Don’t assume you always need to photograph a landmark from directly outside it. Some of my favourite city images come from finding a completely different viewpoint.
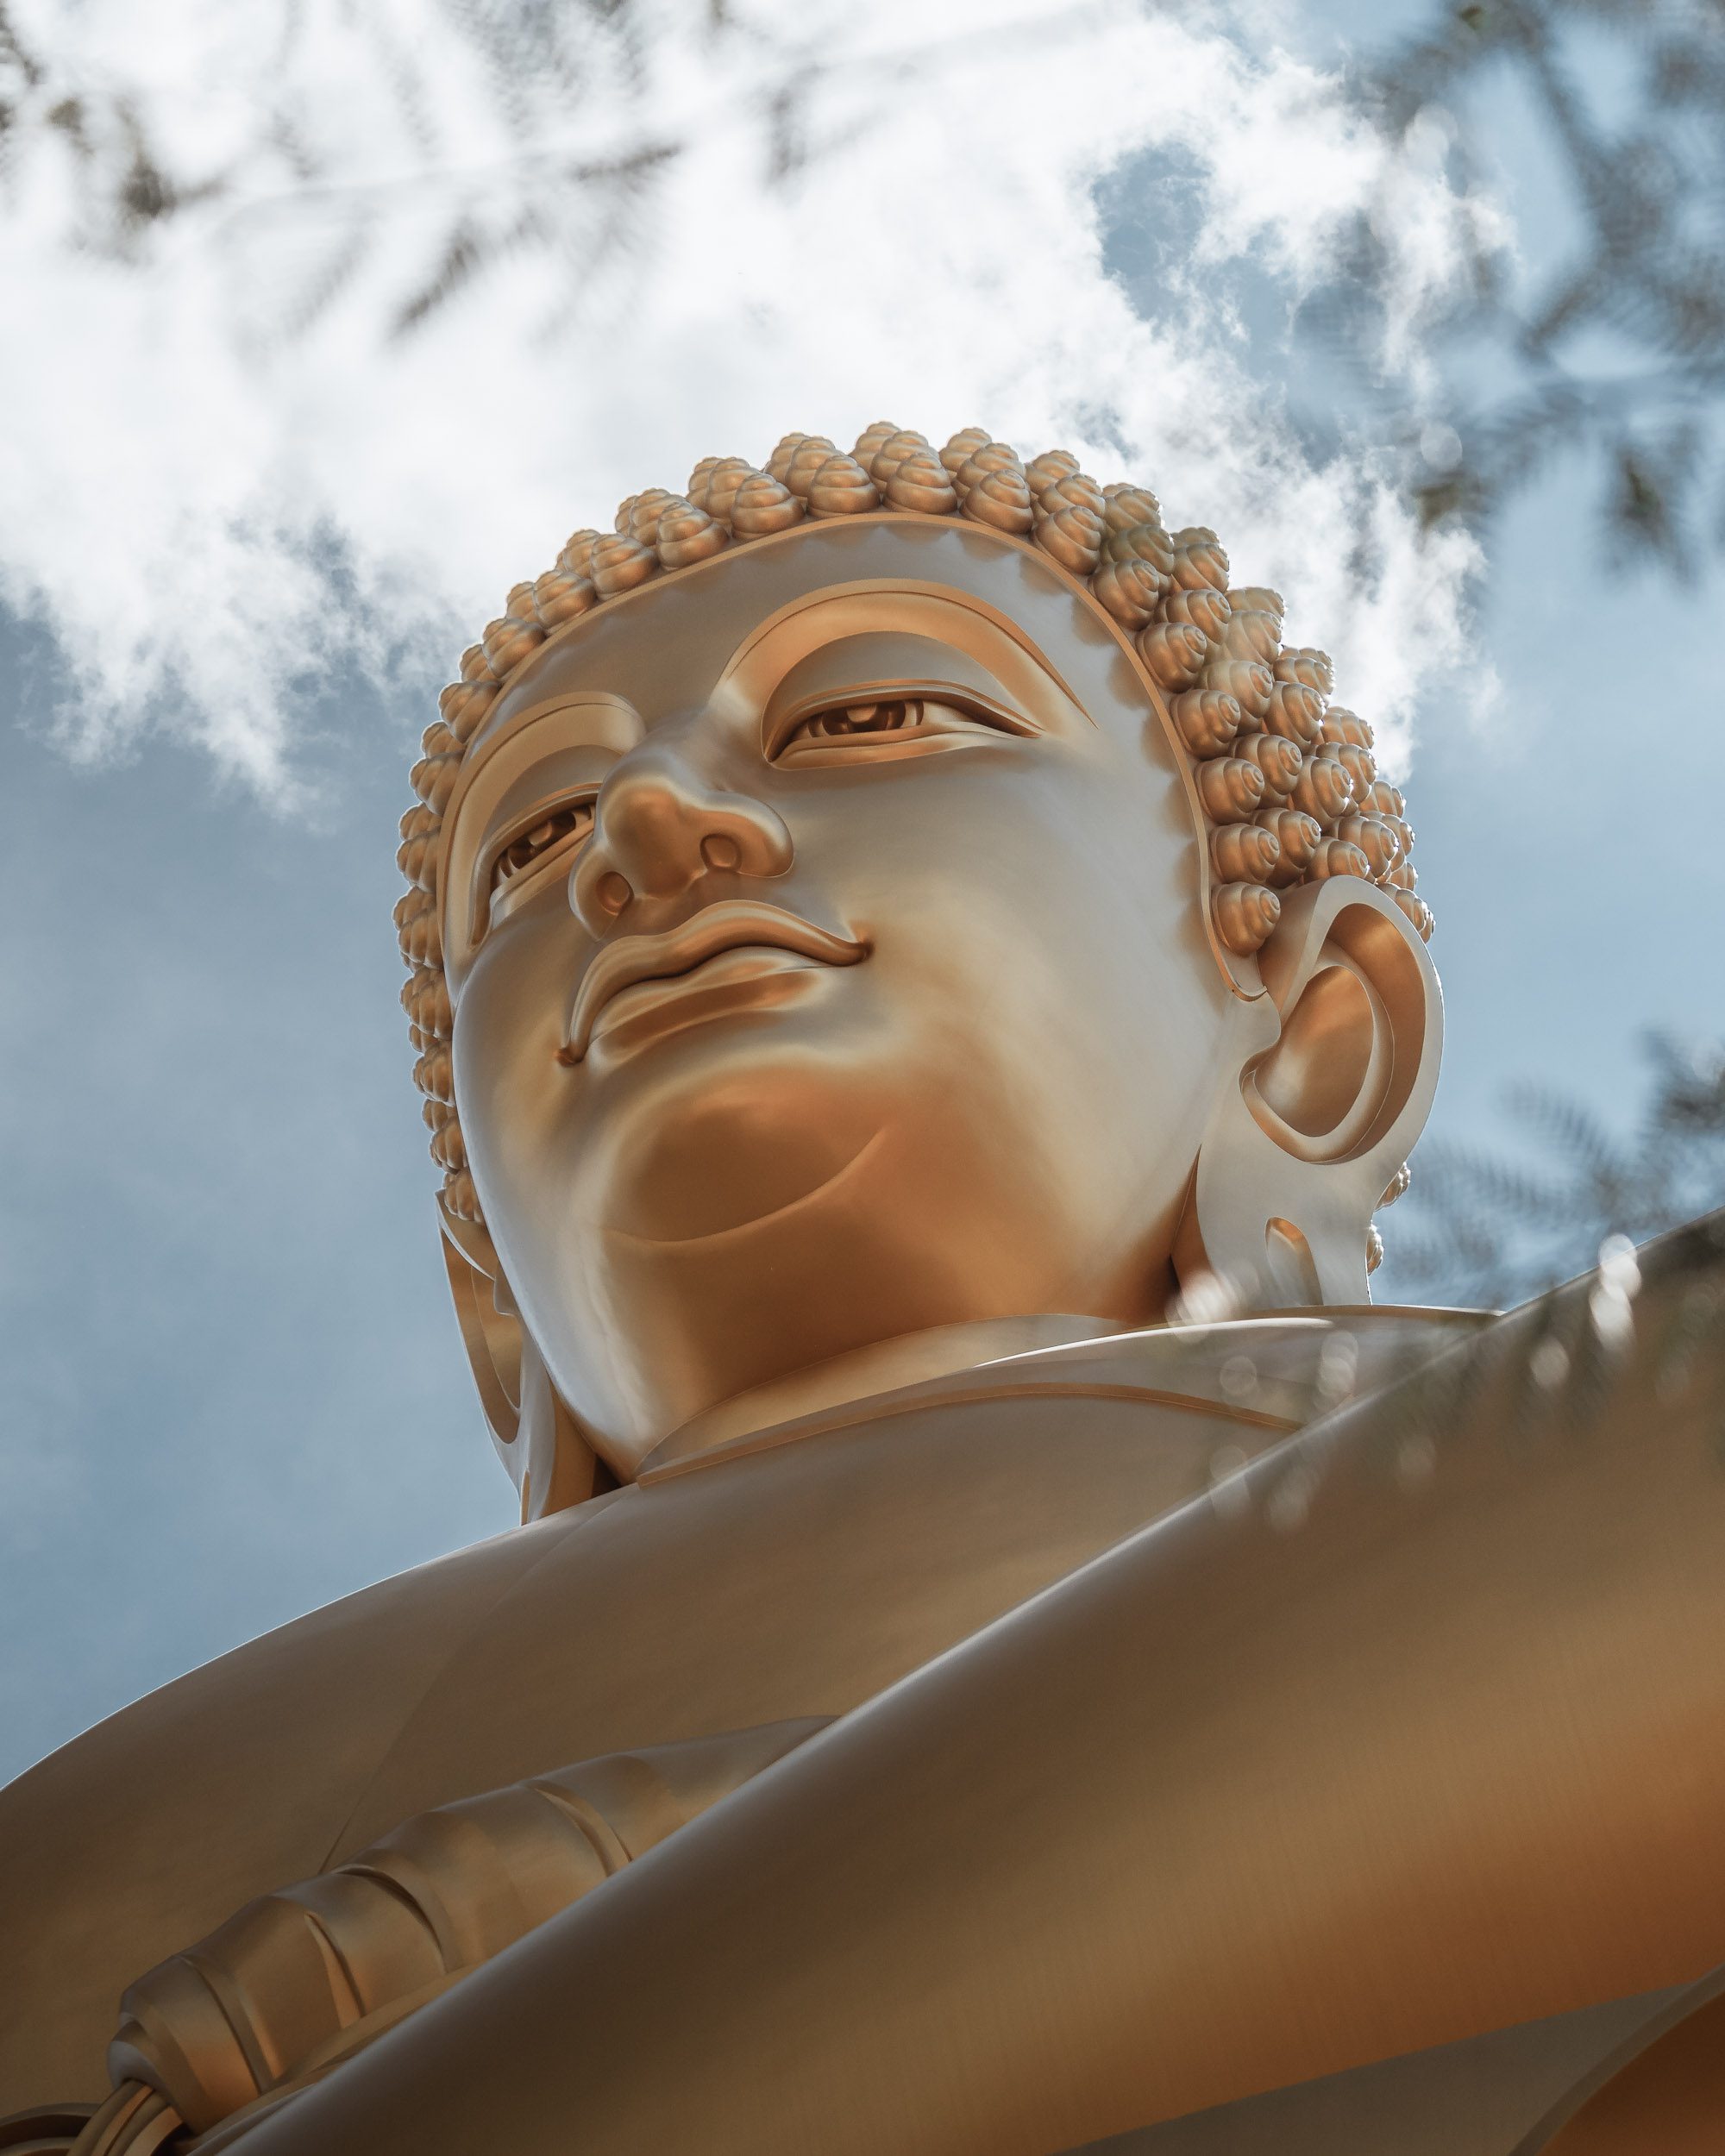
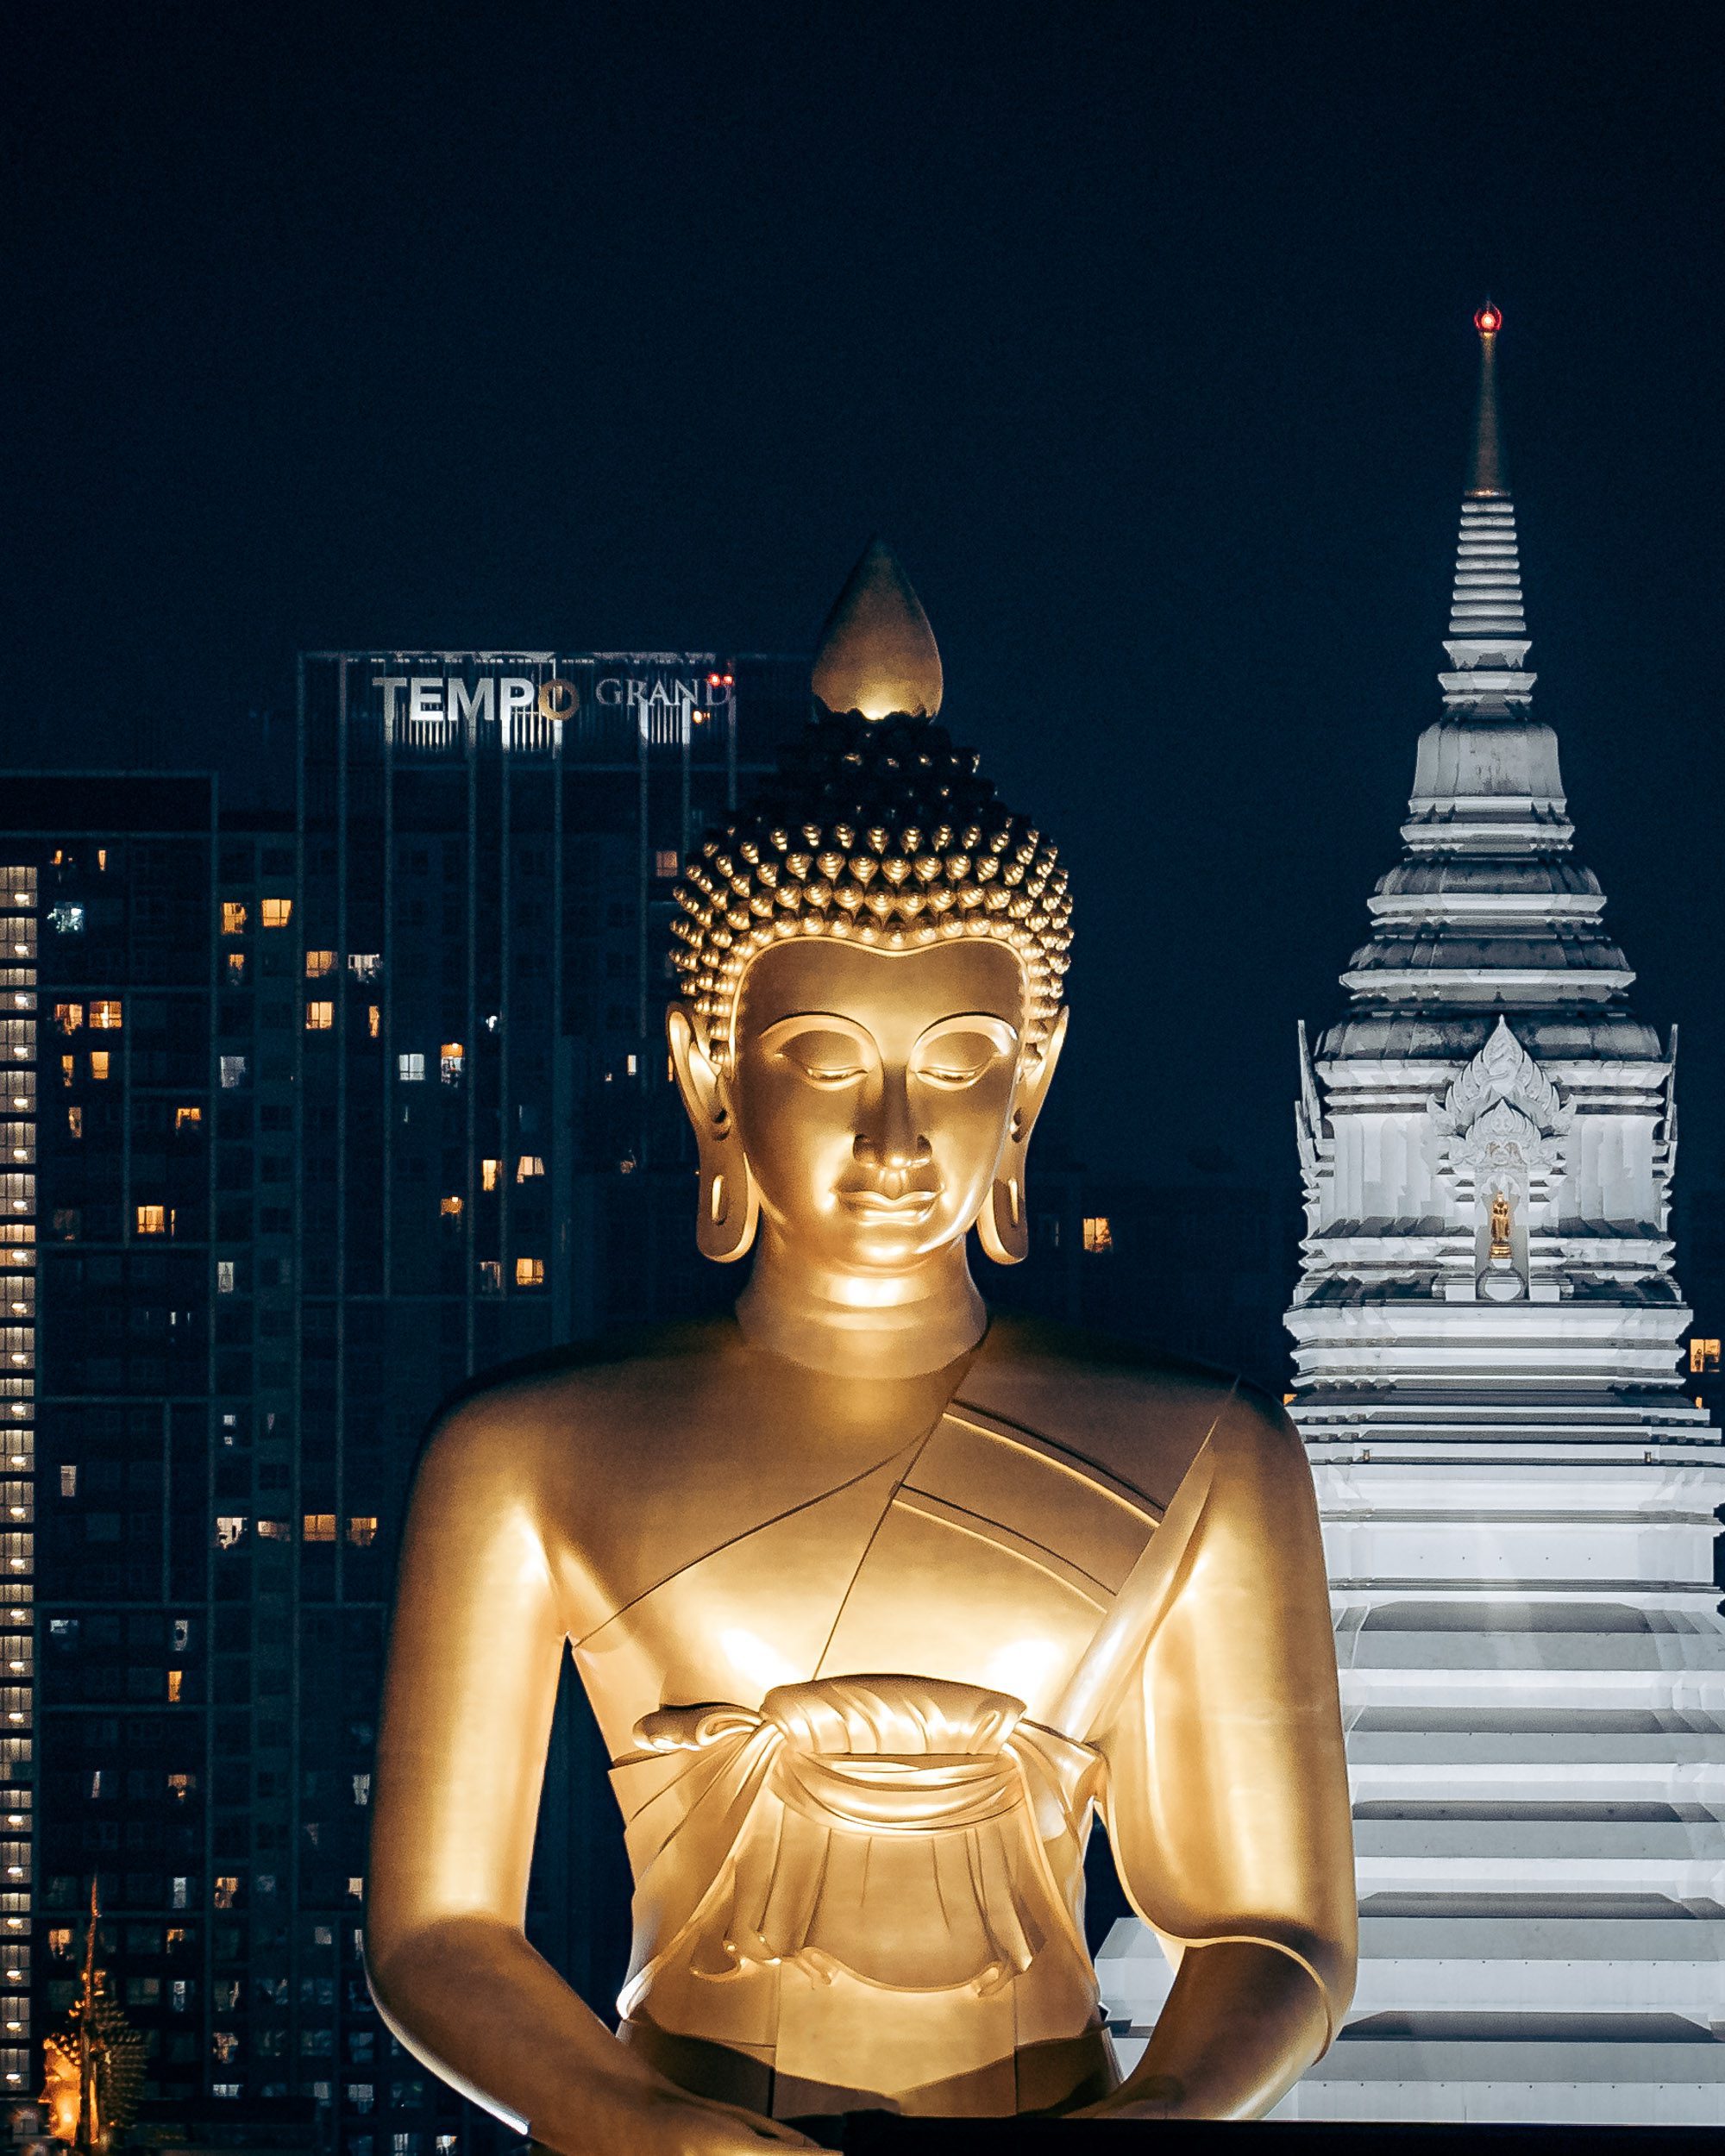
05. Wat Paknam Phasi Charoen
One of the newer locations on my Bangkok photography list is the enormous Buddha at Wat Paknam Phasi Charoen.
The Buddha stands approximately 69 metres tall and became one of the most recognisable additions to Bangkok’s skyline following the completion of its construction in 2021.
It can be seen from a number of viewpoints around the city and makes for some fantastic long-lens photography.
How To Get There
The MRT to Tha Phra is a useful starting point.
The station itself can provide some interesting perspectives, particularly with the surrounding condominium buildings behind the Buddha.
The temple complex is also open to visitors, so it’s worth taking some time to explore rather than simply photographing the Buddha from a distance.
Photography Tip
Bring your longest zoom lens.
The distance between the viewpoints and the Buddha makes a longer focal length particularly useful.
Local Name
If you’re getting a taxi or asking for directions, use the full name:
Wat Paknam Phasi Charoen
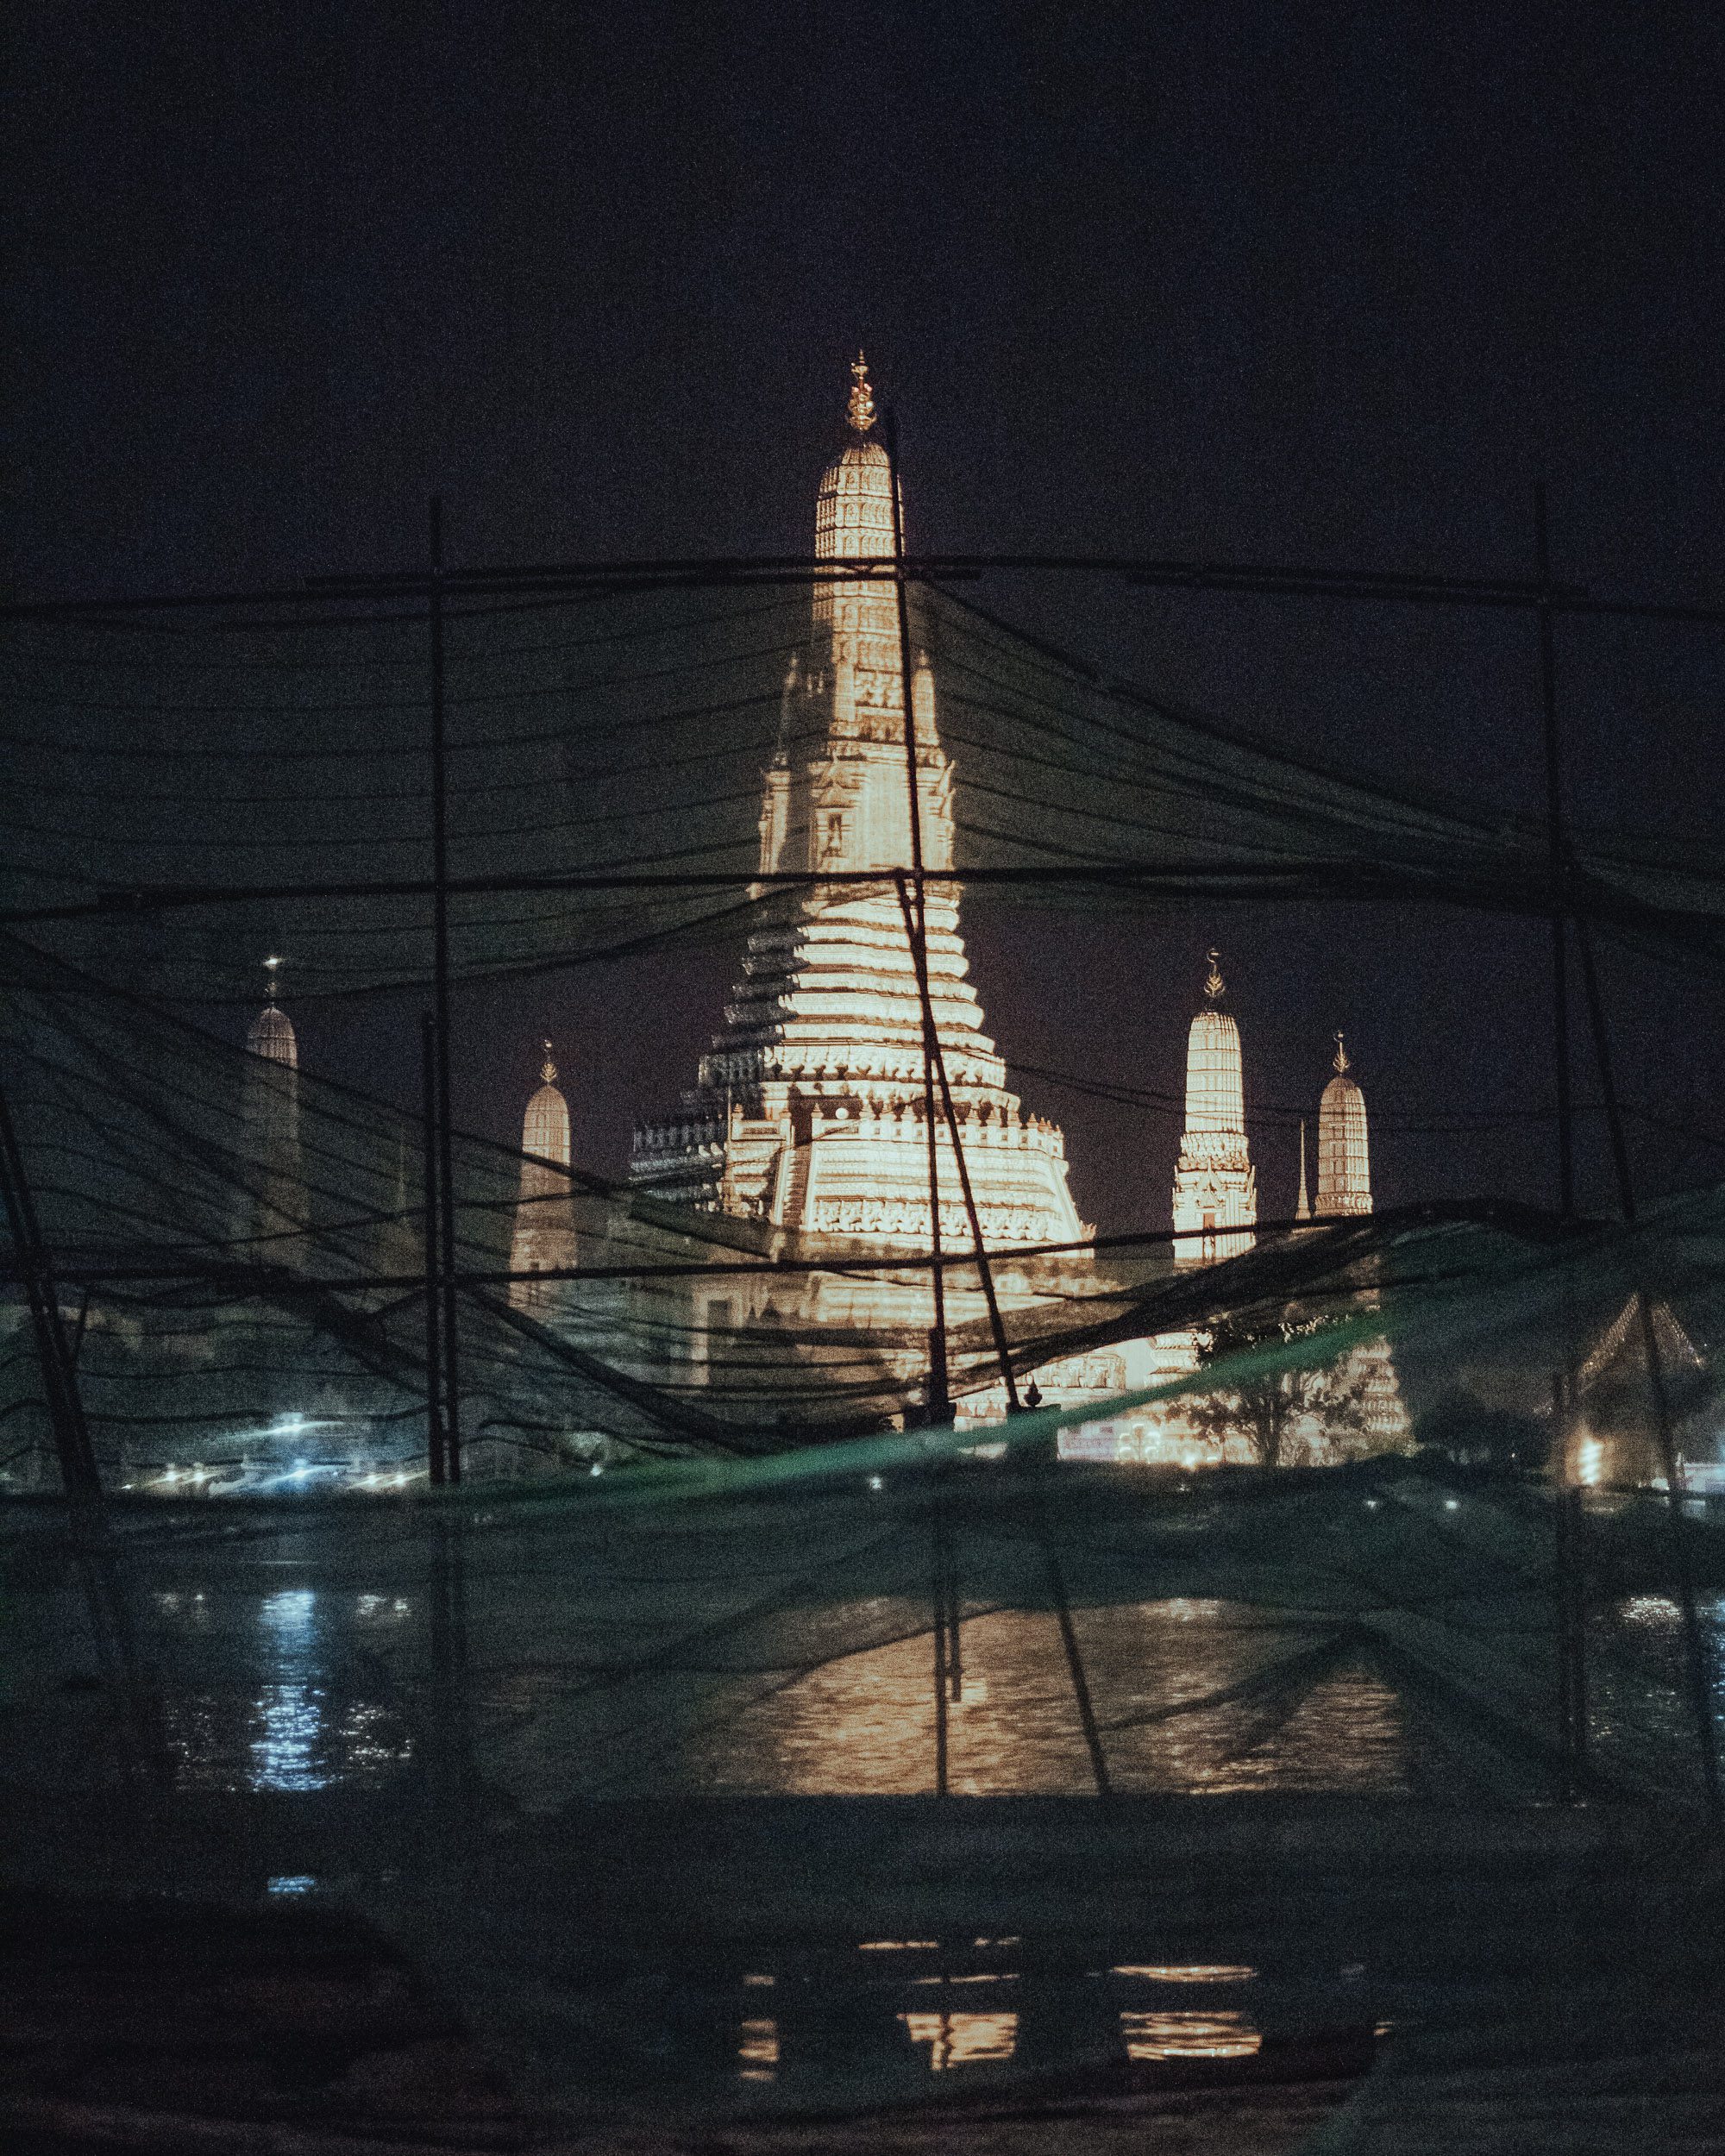
06. Wat Arun
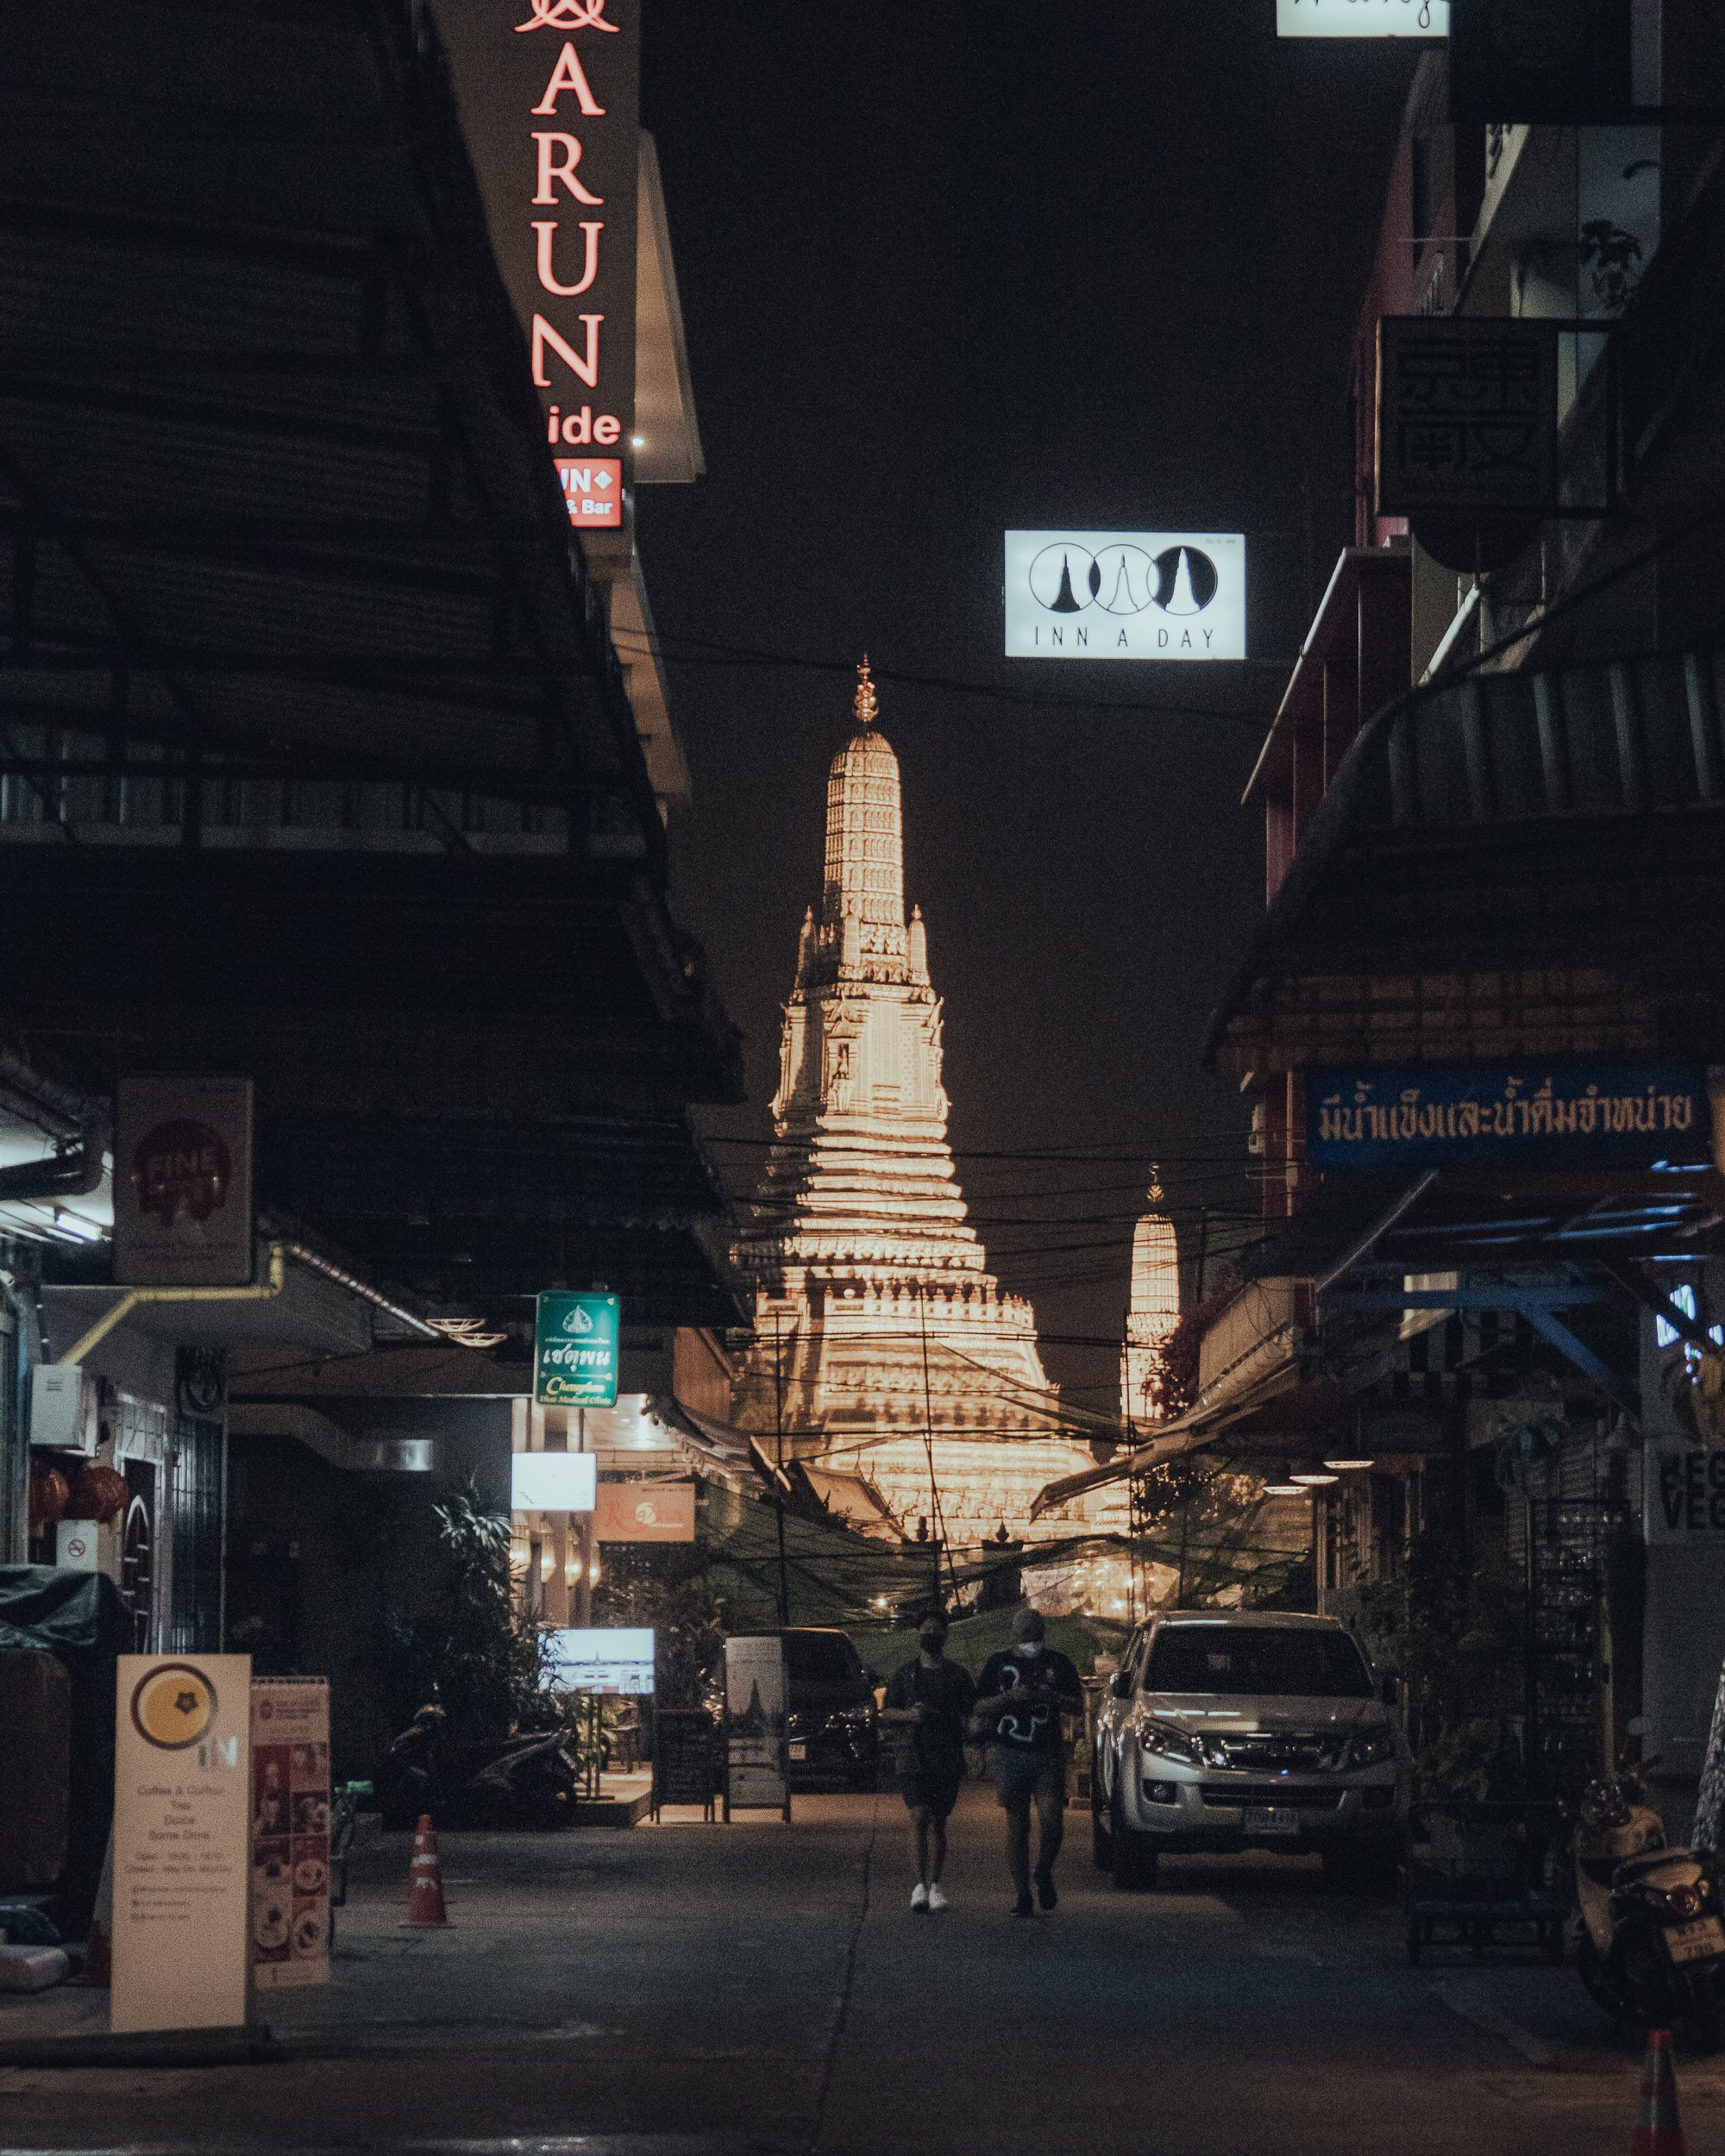
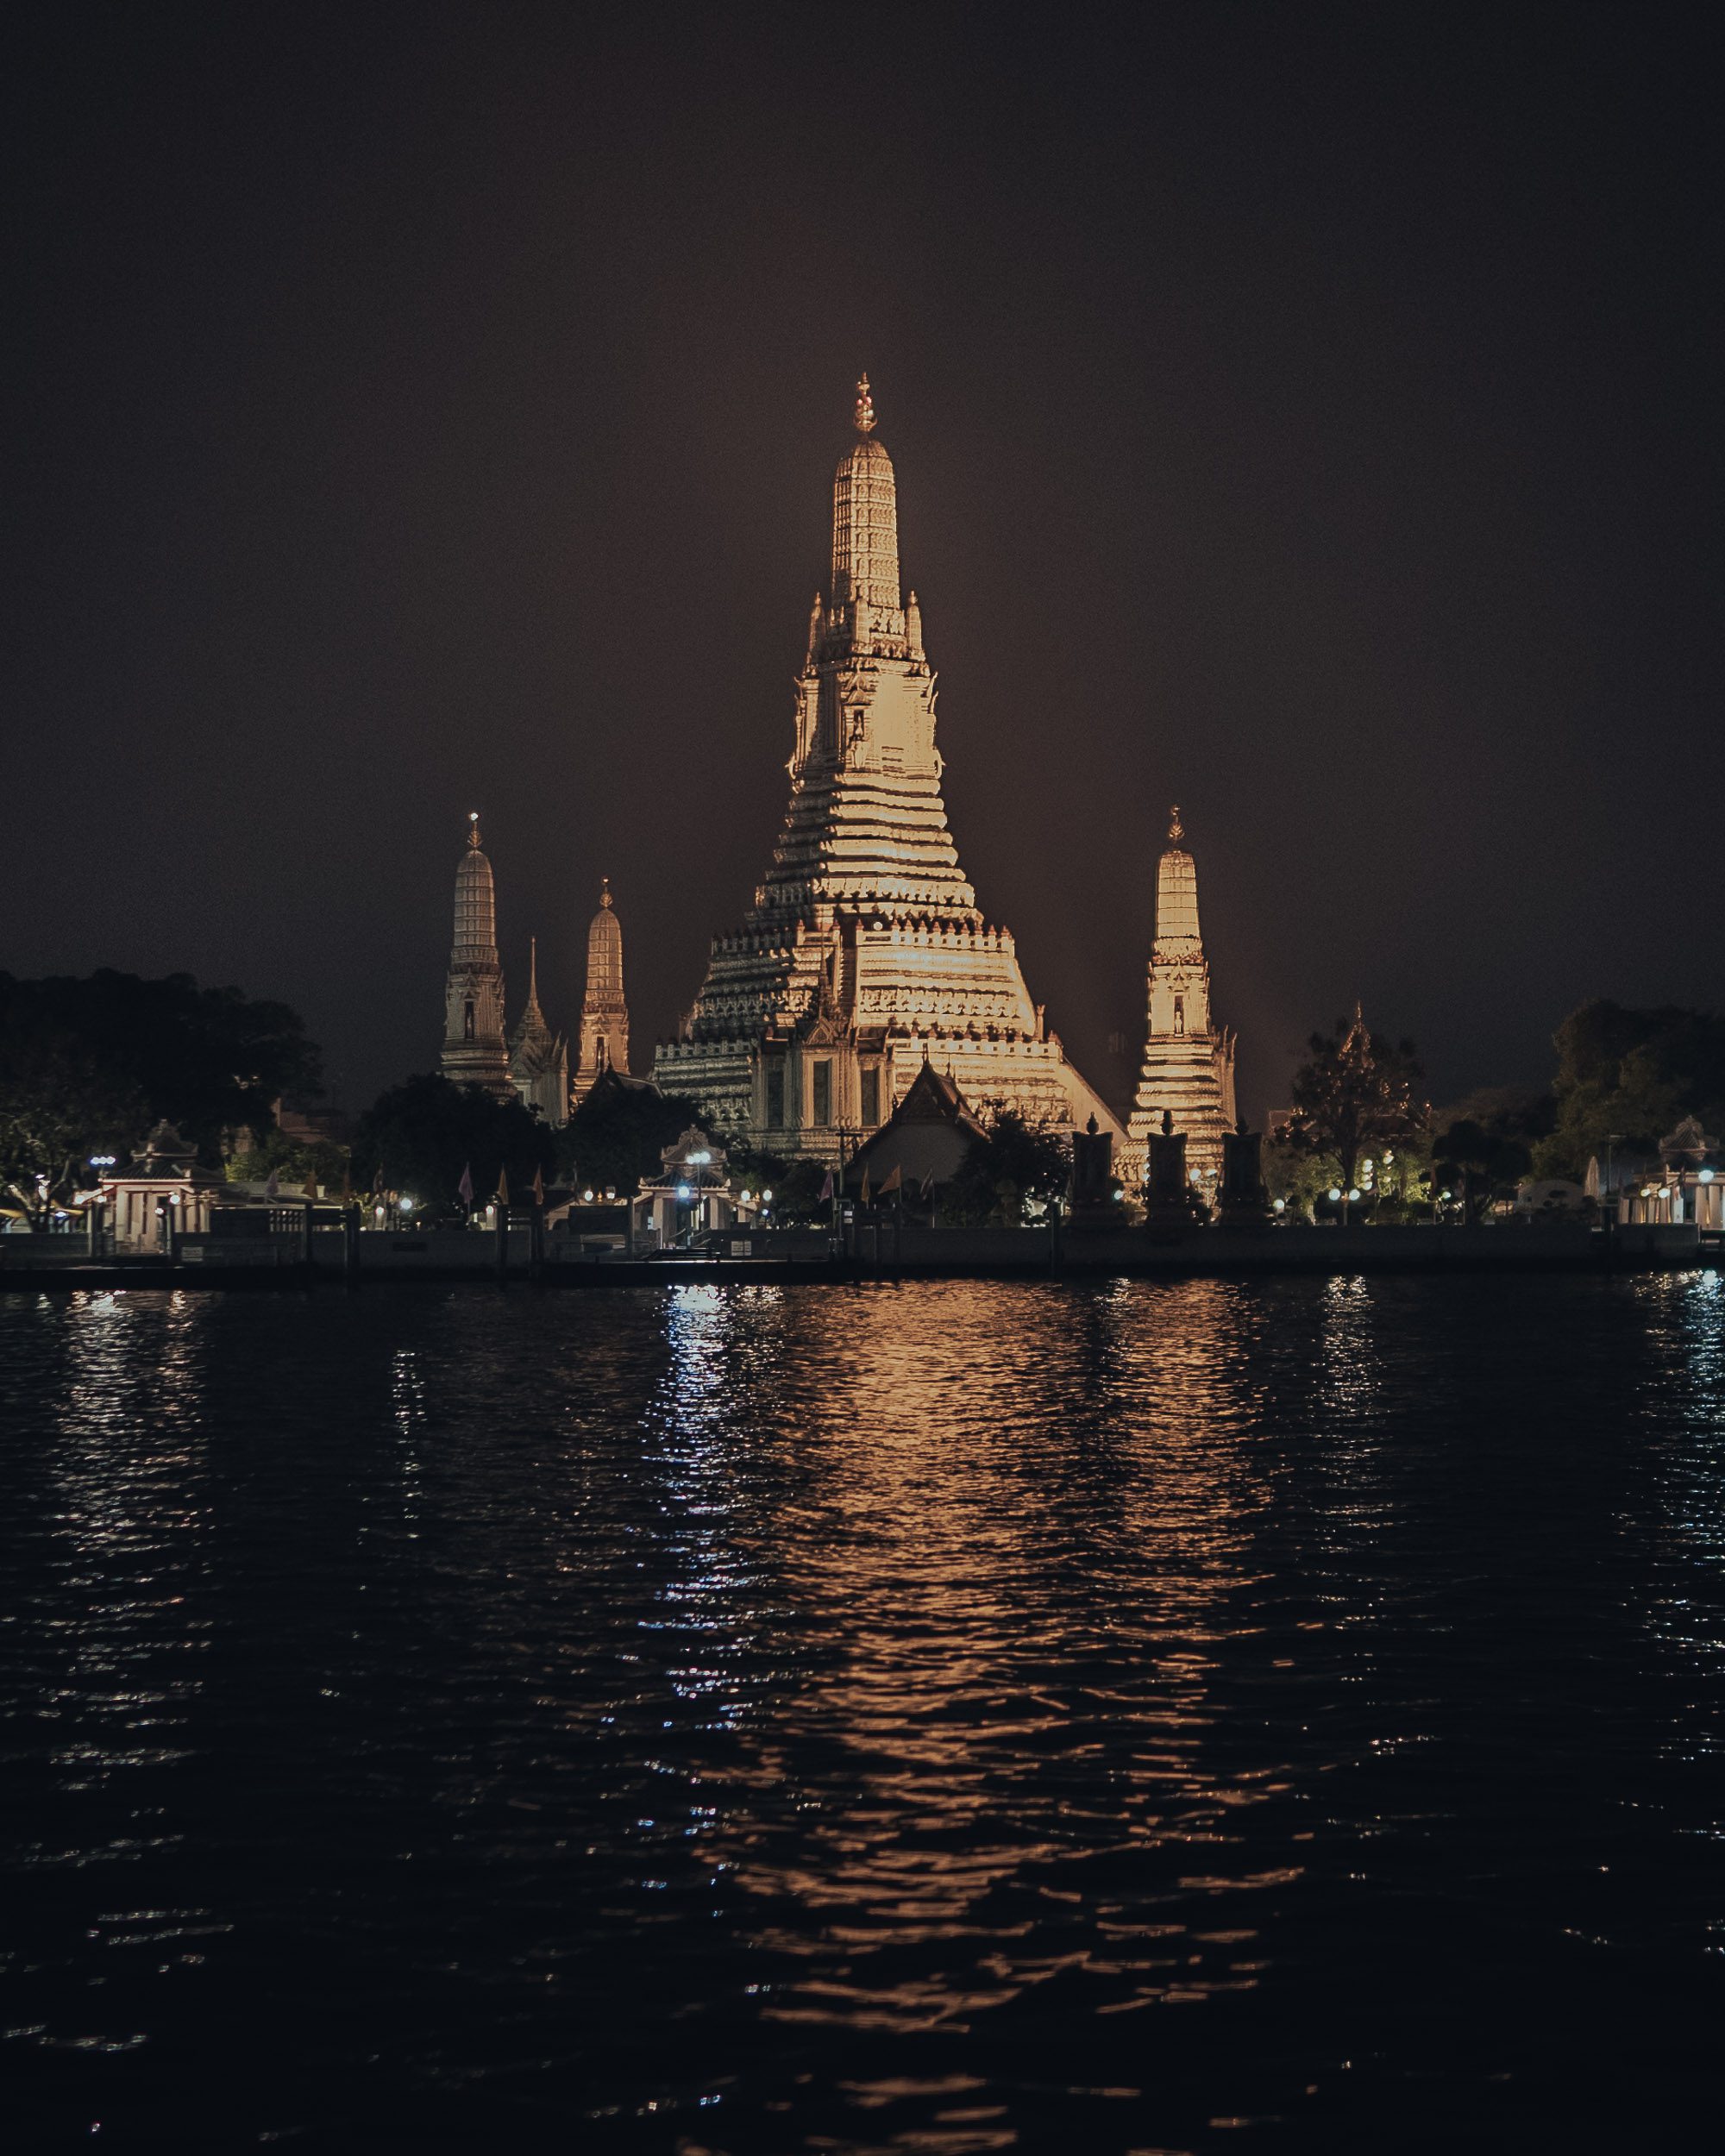
Wat Arun was one of the places we really enjoyed visiting, and I’d definitely recommend making time for it.
If you’re looking for the classic photographs of the temple that you’ve probably seen all over social media, however, remember that some of the best viewpoints are actually from the opposite side of the river.
There are also smaller alleyways around the area that give you opportunities to combine street photography with the temple in the background.
How To Get There
We arrived by tuk-tuk from Chinatown, which took around 20–30 minutes when we visited.
You can also use Grab or arrive by boat from various points along the river.
Best Time To Visit
Late afternoon and before sunset if you’re photographing the temple from across the river.
If you want to explore inside the temple, check the current opening hours and arrive accordingly.
Remember to dress respectfully and cover your shoulders and knees.
Cost
100 THB per person when I visited.
Check the current entrance fee before travelling as prices can change.
Photography Tip
Bring a tripod if you’re planning to photograph Wat Arun from across the river after sunset.
It can be useful for longer exposures and keeping your images sharp as the light disappears.
Food Tip
We stopped at the Arun View restaurants after photographing the temple.
Personally, I found the food expensive for what it was, so I’d recommend getting your photographs and exploring elsewhere for food if you’re looking for better value.
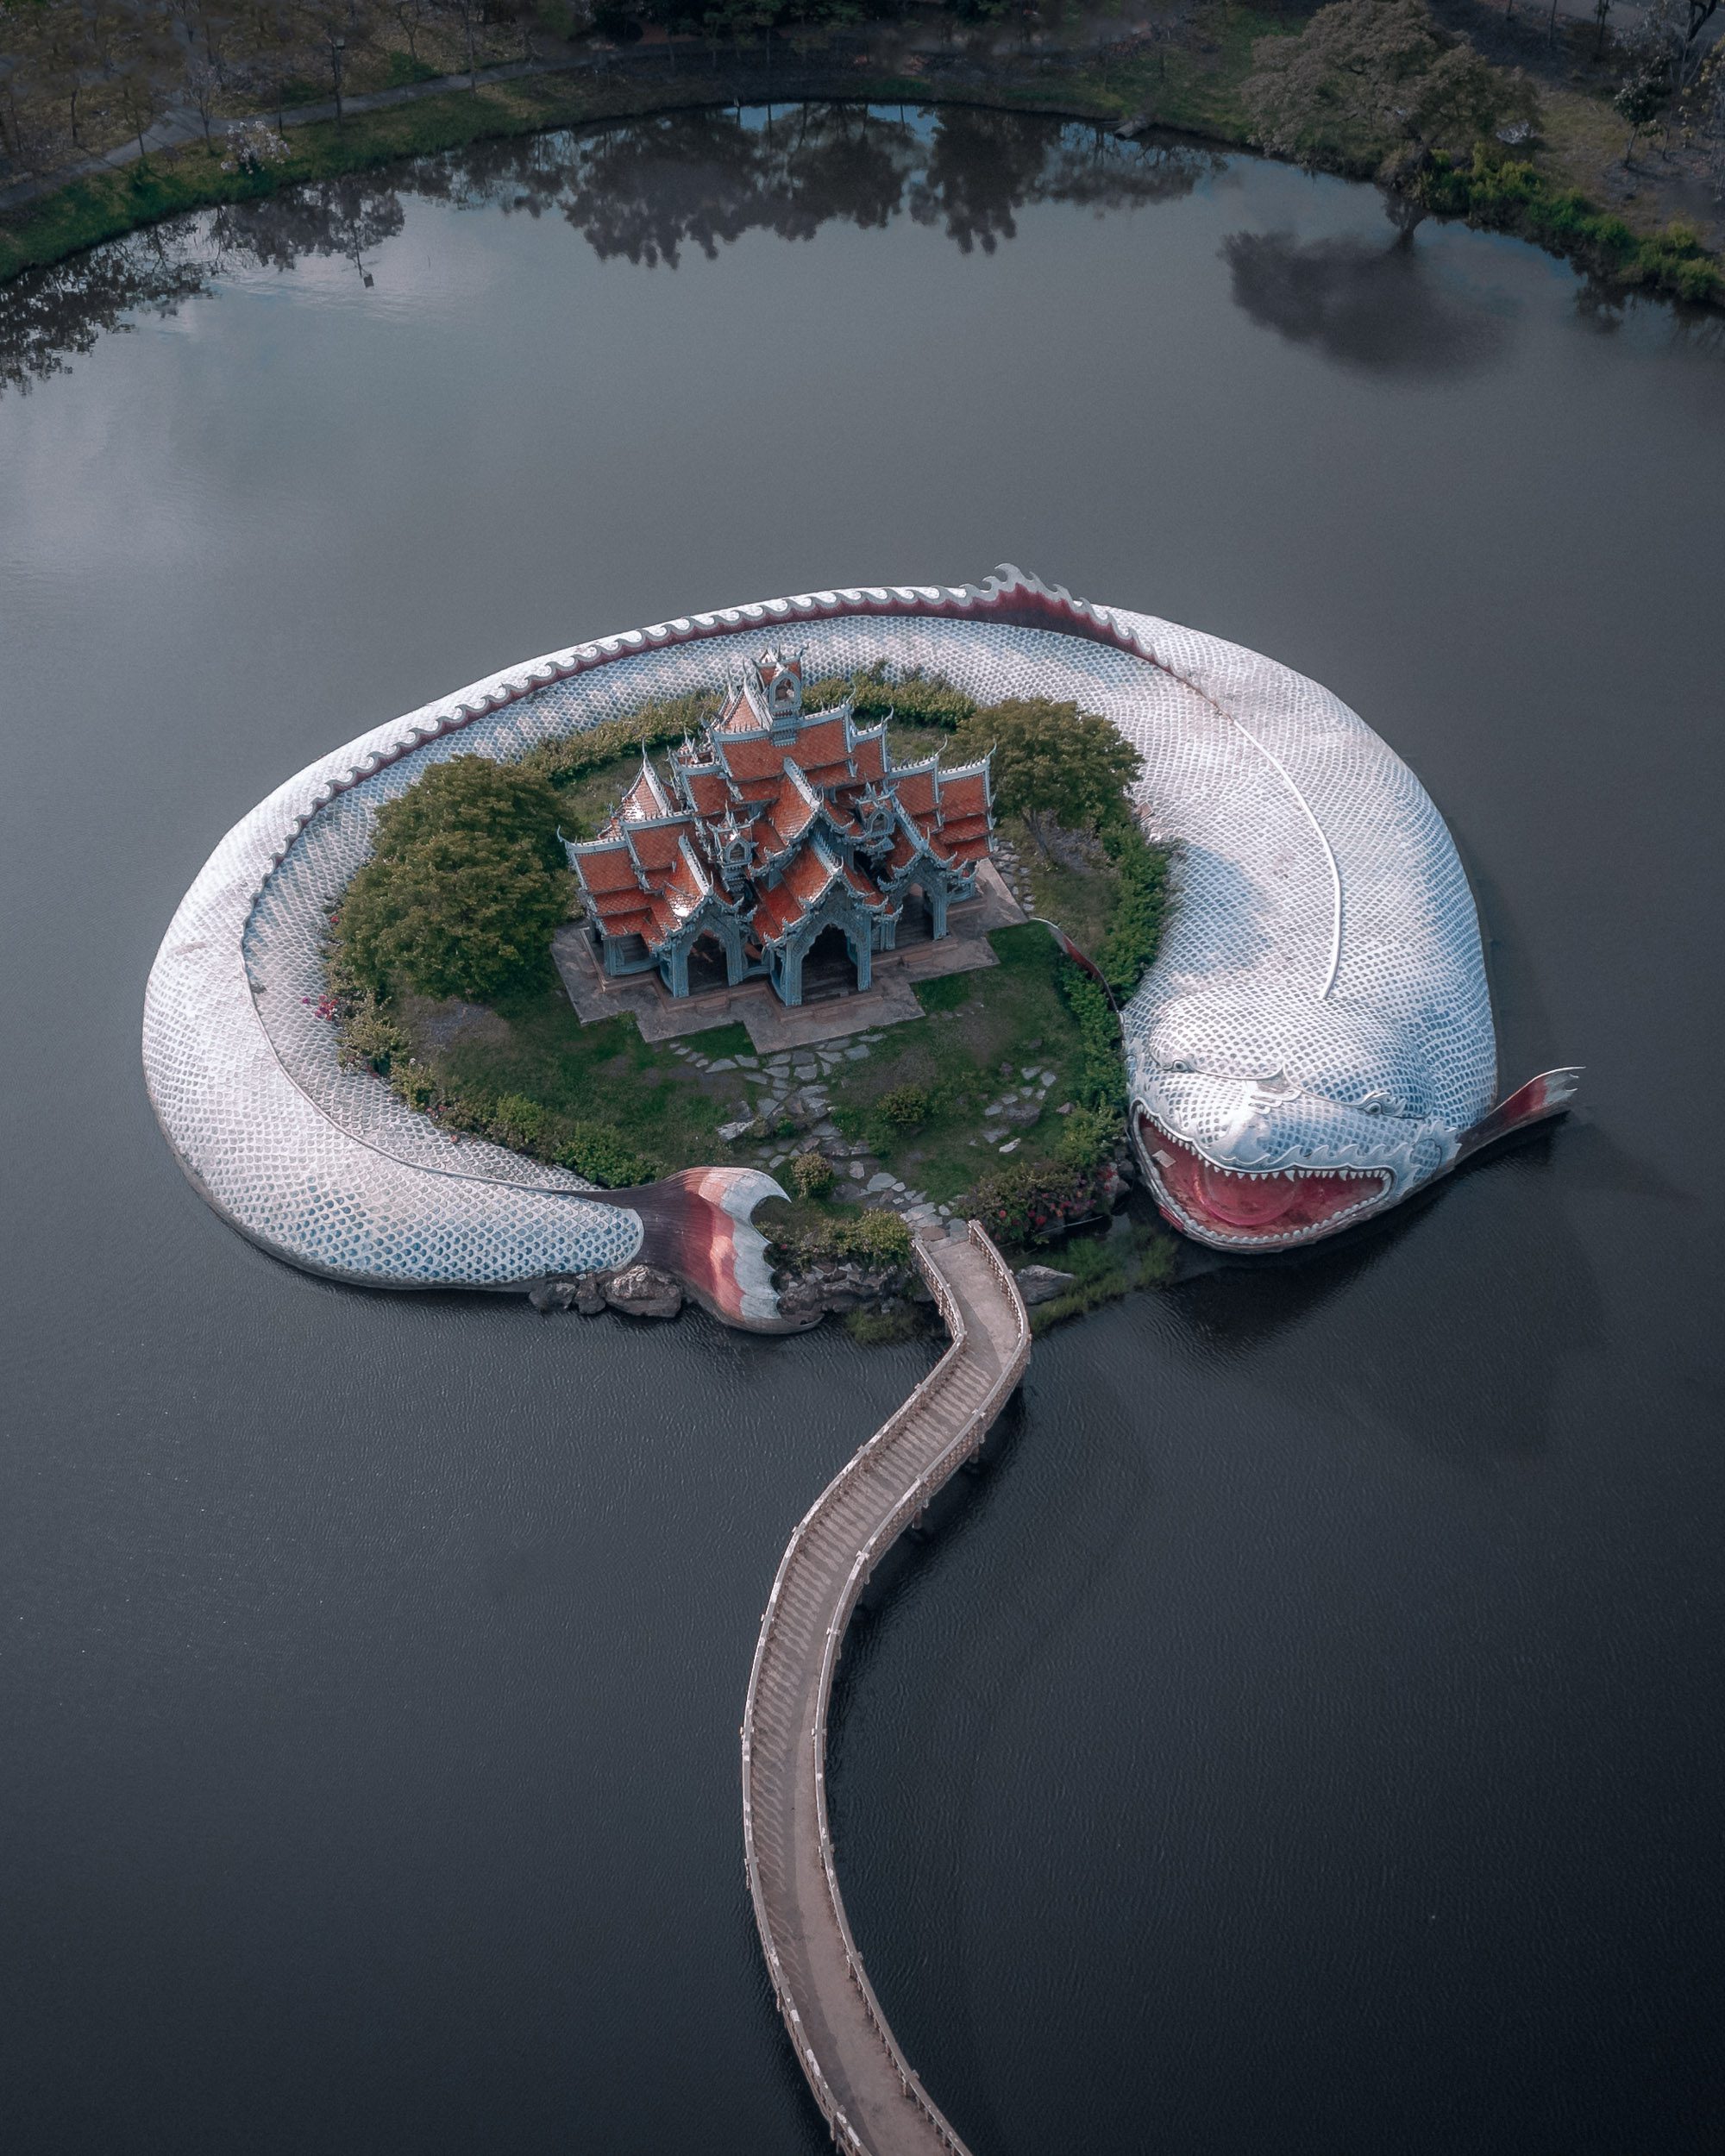
07. Ancient City & Wat Sampran
I’ll be honest — I had never heard of either of these places until they started appearing on Instagram a few years ago.
They quickly caught my attention.
Ancient City
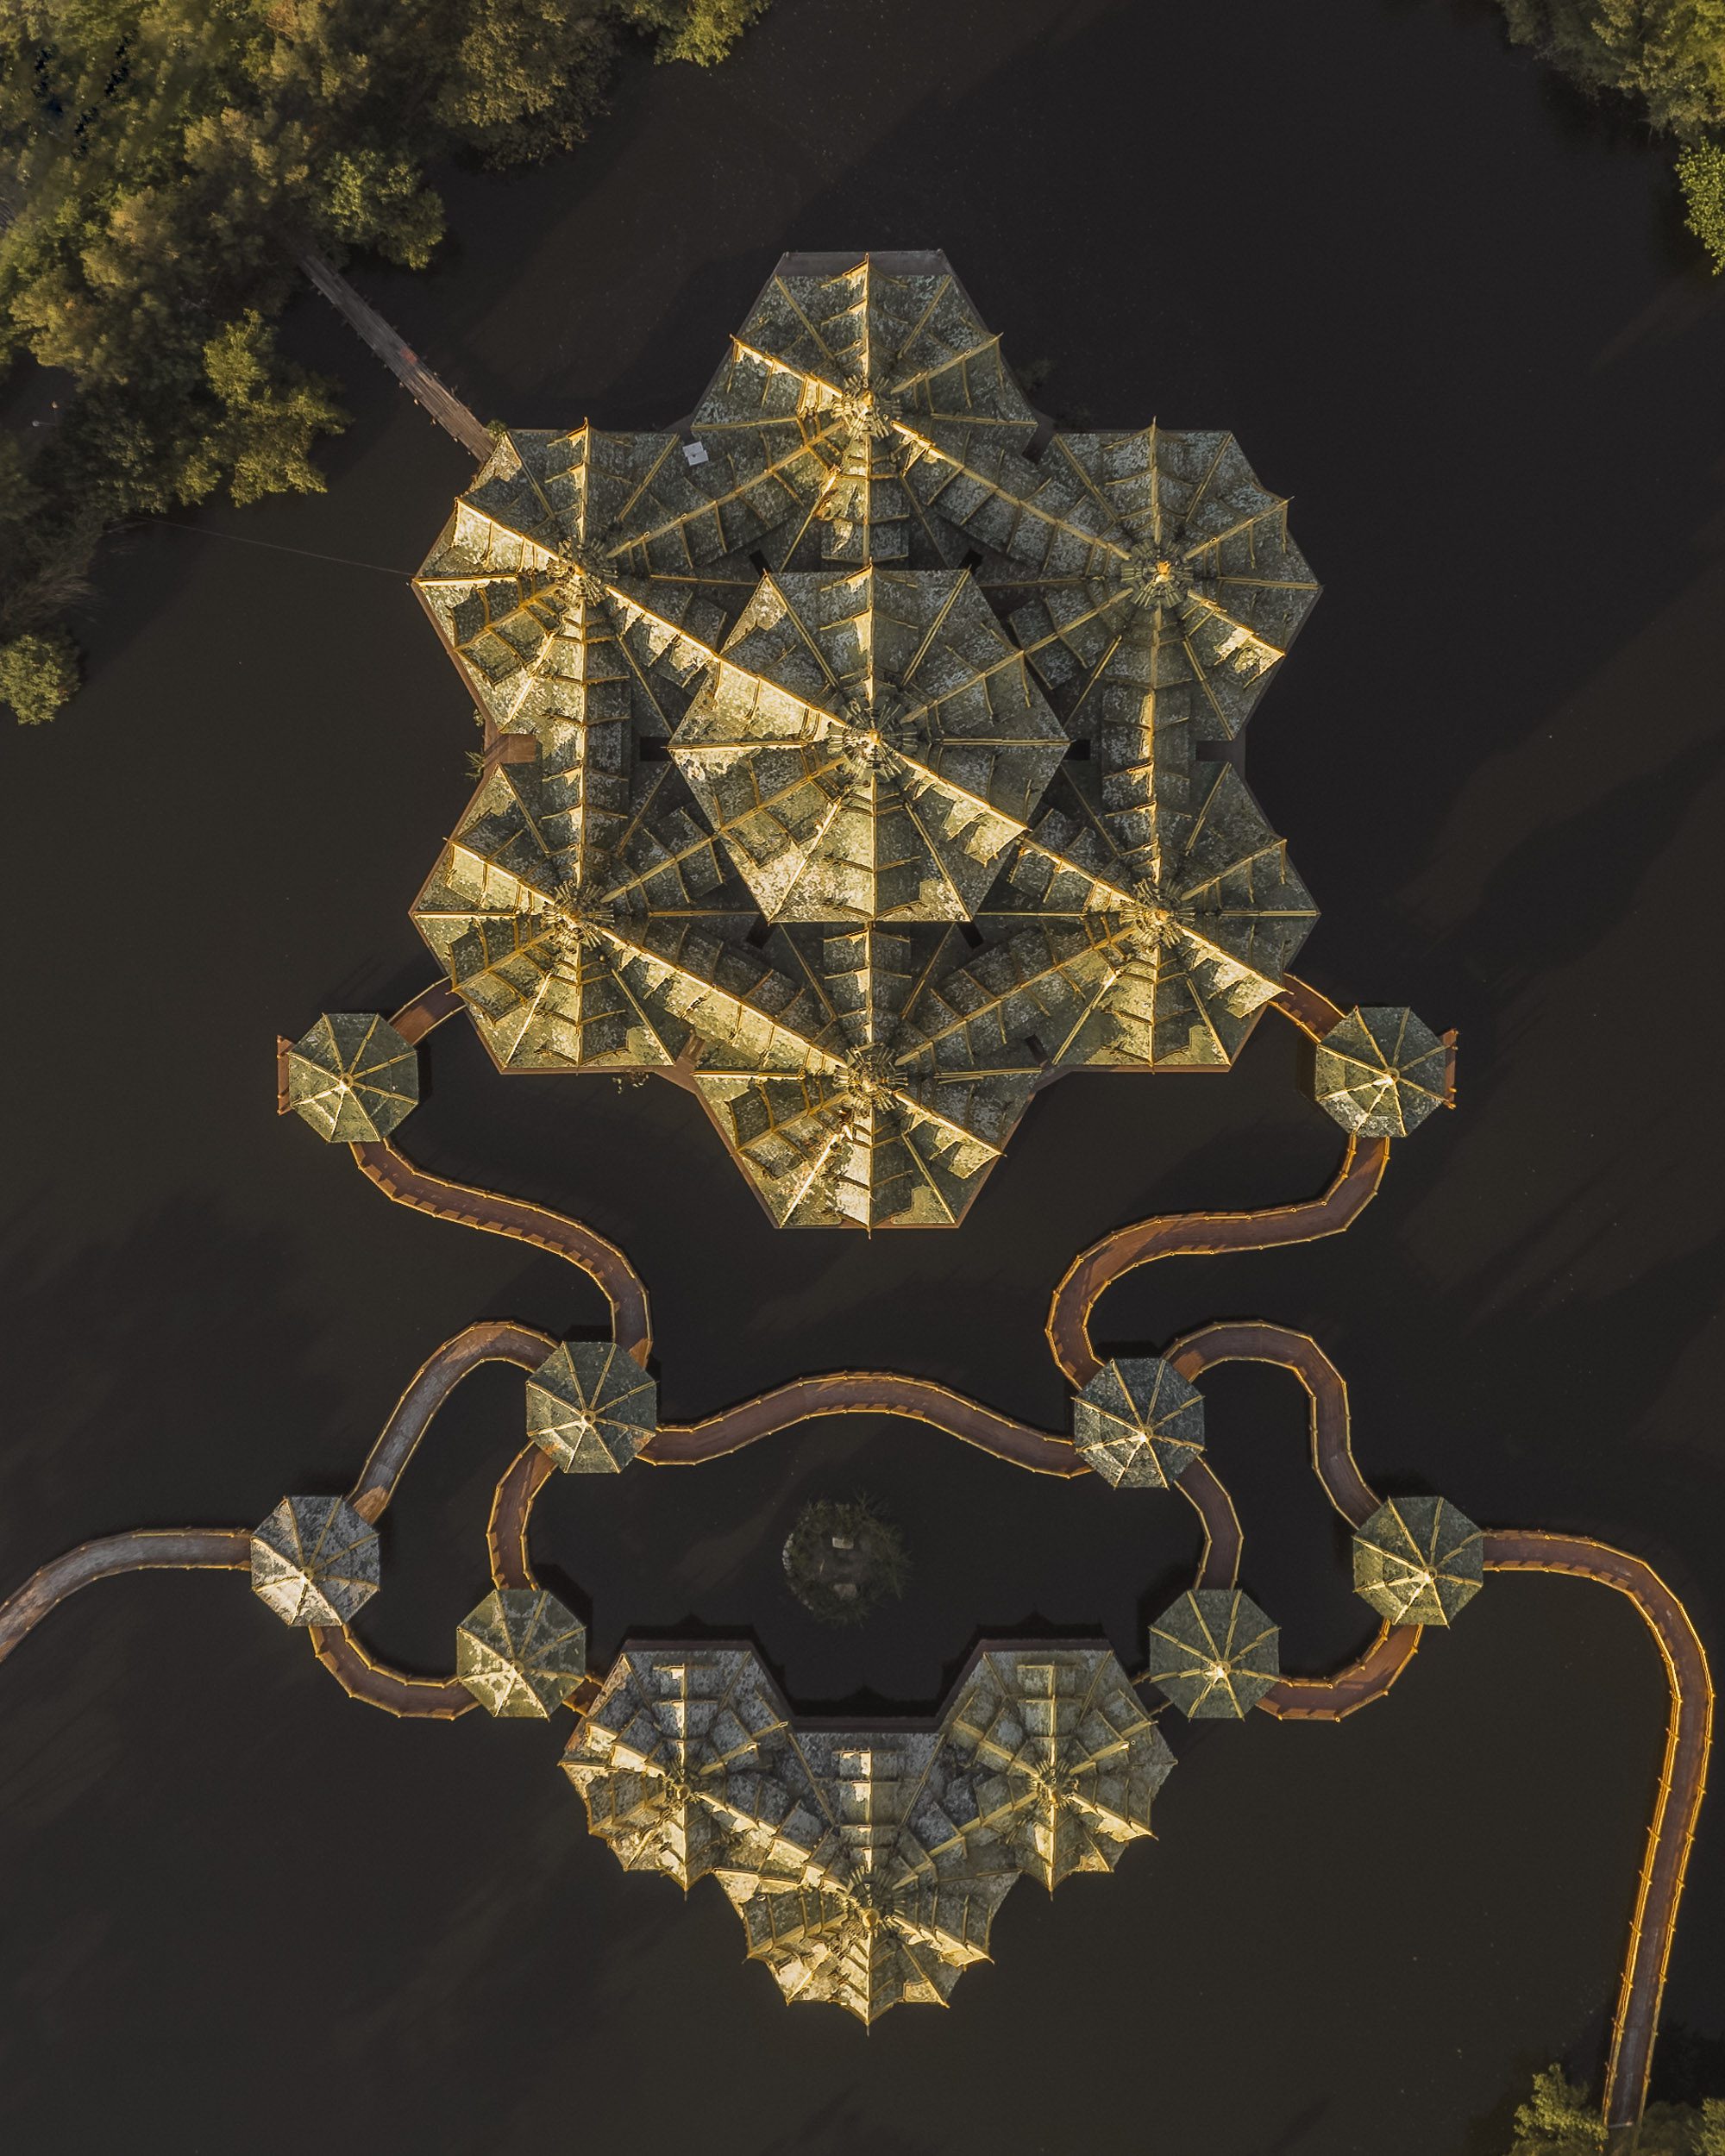
Ancient City is a huge open-air cultural park shaped roughly like Thailand, bringing together replicas and representations of important landmarks from across the country.
It’s somewhere I’d recommend allowing plenty of time for rather than trying to rush through.
I didn’t have enough time to properly explore it during my visit, so I returned early in the morning to photograph from outside and capture some drone images.
If I were doing the trip again, I’d allow much more time for the full experience.
Wat Samphran
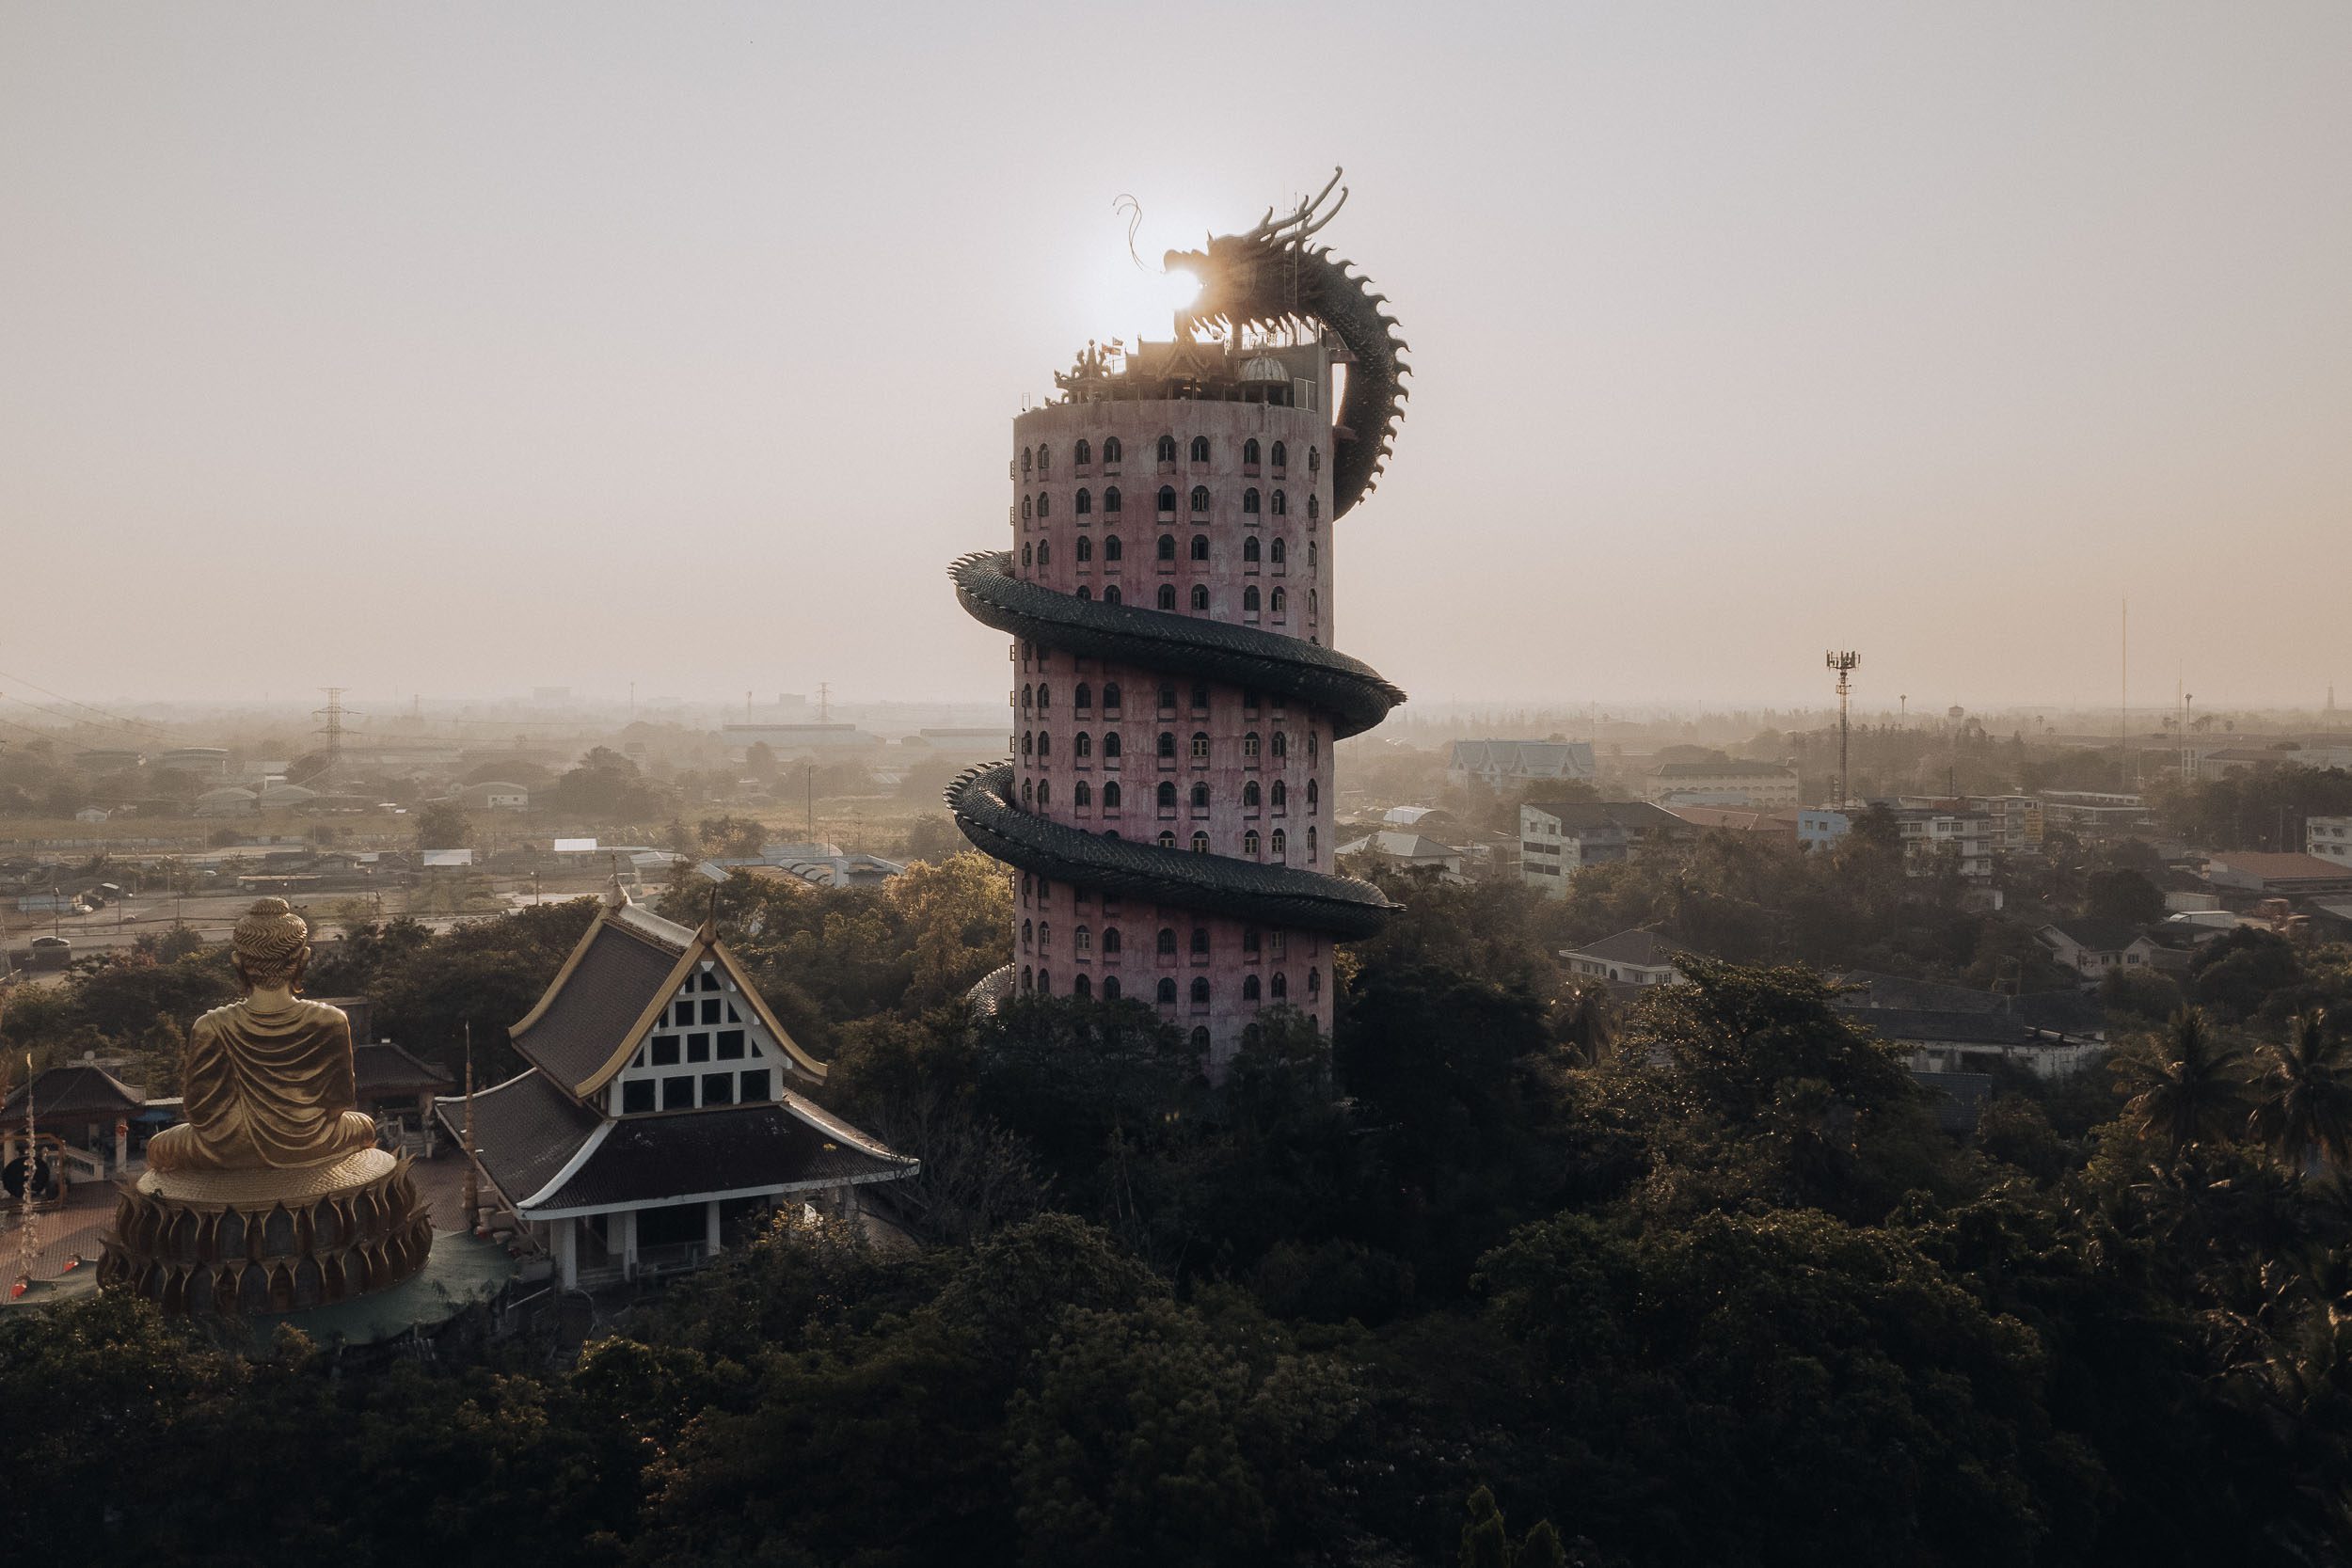
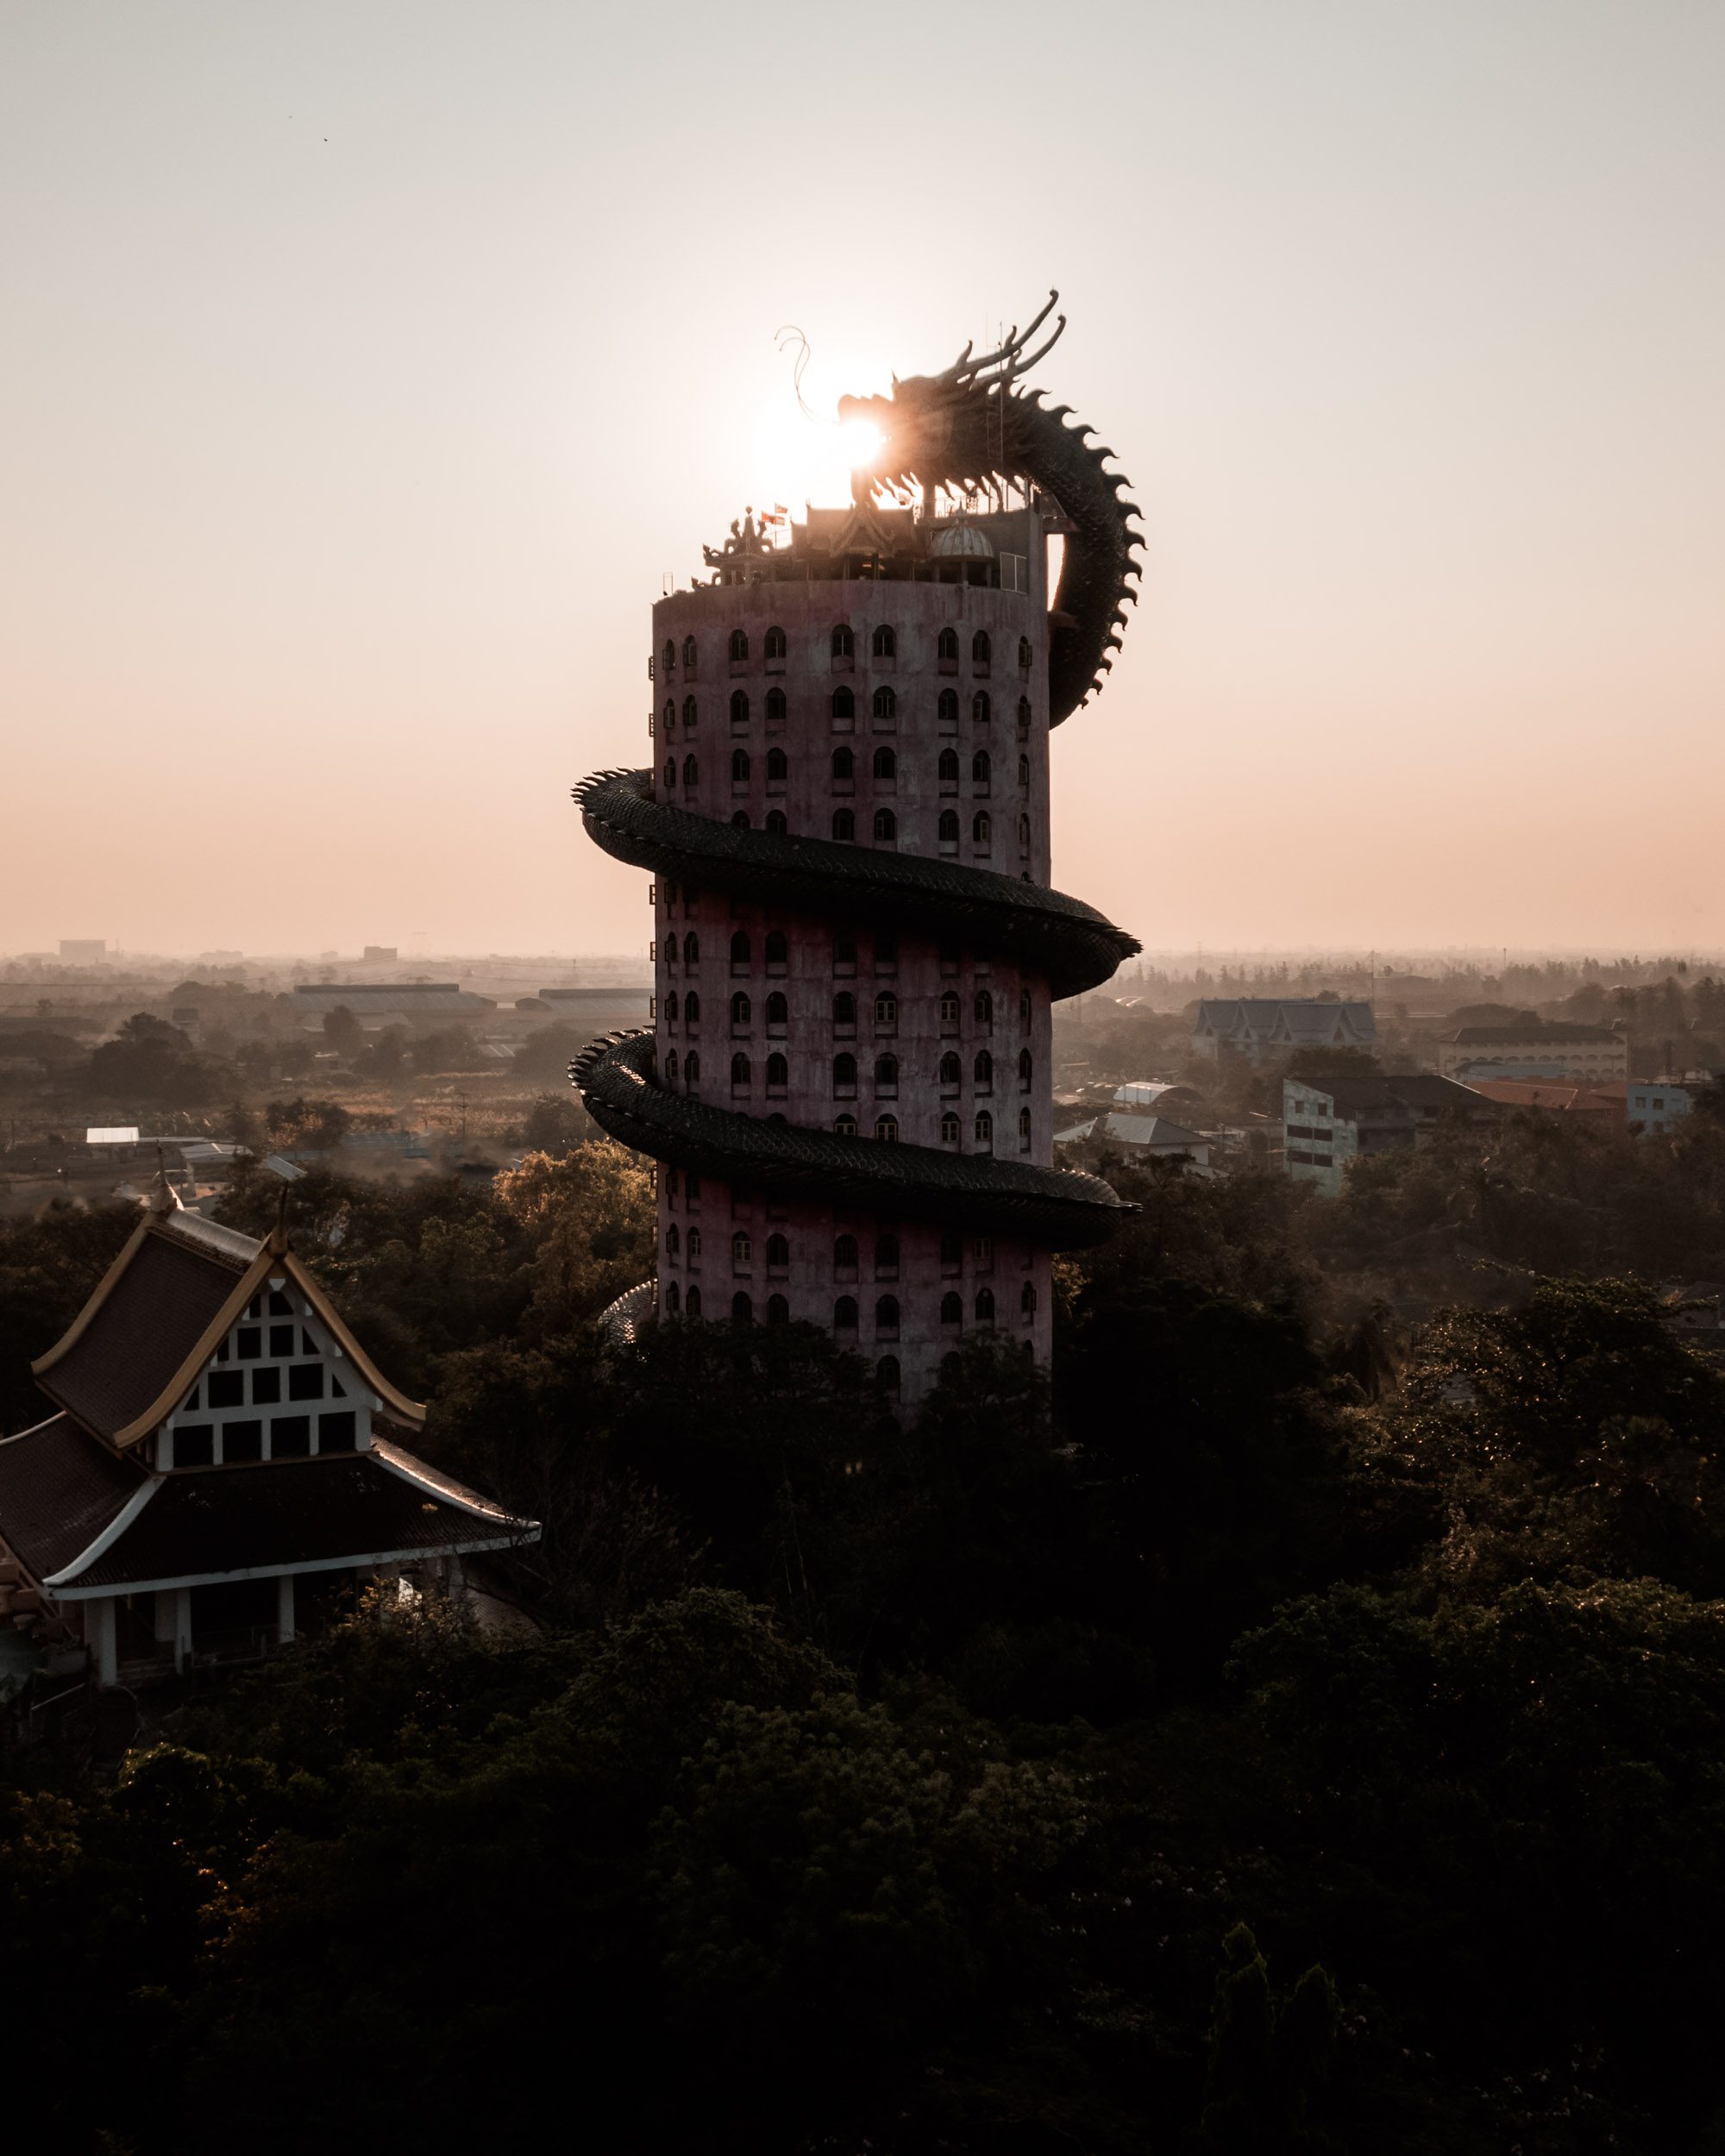
Wat Samphran is instantly recognisable for the enormous dragon wrapped around the temple building.
It’s an incredible subject for photography and feels completely different from many of Bangkok’s more familiar temples.
How To Get There
For convenience and because of time restrictions, I used Grab.
The journey wasn’t particularly expensive, but make sure you have a plan for getting back.
When I arrived at Wat Samphran there were very few Grab drivers around, so I had to wait before finding a normal taxi.
Public transport is also possible using the BTS combined with local Songthaews.
Best Time To Visit
Sunrise
I’d recommend arriving early and allowing plenty of time to find your composition.
Photography Tip
If you’re travelling by car, consider asking your driver to wait for you at Wat Samphran.
Getting a ride back can be much harder than getting there.
For Ancient City, I’d recommend allowing a full morning or even most of a day if you want to explore properly rather than simply stopping for a few photographs.
My Bangkok Photography Tips
Bangkok is incredibly photogenic, but the conditions can be challenging.
The heat and humidity can be intense, particularly if you’re carrying a camera bag around all day.
Shoot Early
Sunrise gives you softer light, cooler temperatures and fewer people.
Use The Light
Late afternoon and early evening can be particularly rewarding, especially around temples and the river.
Carry A Long Lens
A 70–200mm or similar zoom can be extremely useful for isolating buildings and compressing Bangkok’s busy skyline.
Don’t Just Photograph The Landmark
Some of my favourite images come from photographing the people, streets and environment around a landmark rather than simply taking another photograph of the building itself.
Carry Mobile Data
Google Maps can be incredibly useful for checking transport, finding locations and even working out when trains are due.
Take Care In The Heat
Drink plenty of water and don’t underestimate how quickly the Bangkok heat can drain you.
Pete’s Tip: Give yourself time to wander. Some of the best photographs I’ve made in Bangkok have come from simply getting lost and seeing what I find.
Useful Bangkok Travel Resources
A few official resources worth checking before your trip to Bangkok. These can be useful for planning your visit, checking transport information and getting the latest practical travel information.
Tourism Authority of Thailand — Bangkok
For official information on things to see and do, food, shopping, accommodation, transport and attractions across Bangkok.
→ Visit the Tourism Authority of Thailand’s Bangkok guide
Bangkok MRT
Useful for checking the latest MRT routes, stations, operating information and planning journeys around the city.
→ Visit the official Bangkok MRT website
Suvarnabhumi Airport (BKK)
The official website for Bangkok’s main international airport, with current arrivals, departures and airport information.
→ Visit Suvarnabhumi Airport
Final Thoughts
Bangkok is a city that took me a while to appreciate.
My first visit wasn’t love at first sight. Coming from a small village in the south east of England, the sheer pace, scale and energy of Bangkok was a huge change from what I was used to.
After returning again and again, though, it became one of my favourite cities to explore.
There is always another street, restaurant, temple, market or viewpoint to discover, and even after multiple visits I still find myself adding things to the list for next time.
If you’re visiting Bangkok for the first time, don’t worry about trying to see everything.
Pick a few places, leave yourself time to explore between them and allow yourself to get a little lost.
You never know what you’ll find.
Related Guides
Planning more of your Thailand adventure? Explore some of my other Thailand travel stories and guides:
About Pete
I’m Pete, a British photographer specialising in outdoor lifestyle, travel and hospitality photography.
Much of my work takes me around the world, photographing hotels, destinations, people and experiences along the way. These travel guides are a collection of the places I’ve visited, photographed and enjoyed exploring.
Are you a hotel, travel brand or hospitality business looking to work together? Get in touch to discuss photography or content for your next project.